Mug Muffins


My husband travels a lot for work - which means we stay in our pj's a lot and eat quick and easy meals when he's gone.  Actually, if it were socially accepted, I'd keep my kids in pj's all day, every day for their entire lives.  What's cuter than a kid in pajamas?  Me, on the other hand - I'm not so cute in my pajamas, but ah well.  You win some, you lose some.

Since we do the everyone sits around the dinner table family dinners, when he's gone, I am going to admit that I tend to get a little lazy streamlined. Ahem.  I tend to choose things that are quick and easy, which can make staying healthy sort of challenging.  A lot of times quick and easy = not so good for you.  That's why I was really excited to find this fun breakfast/dessert idea from Flavorator.


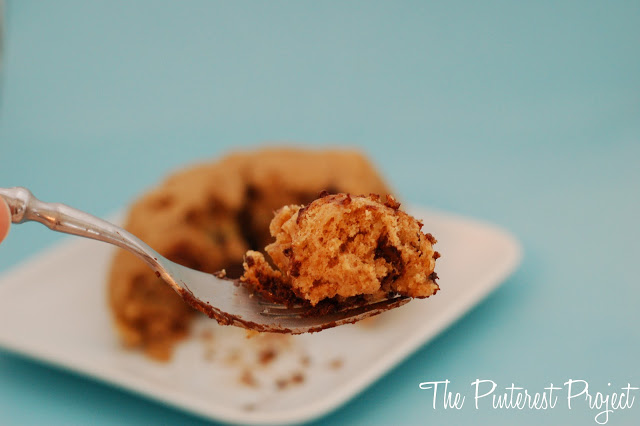
You may have seen me post on my Facebook page awhile back about trying a cookie in a mug recipe that our friend Melissa at No. 2 Pencil created.  It was awesome!  So this morning, I was eyeing my overripe bananas and wondering about a banana bread/muffin in a mug recipe.  And sure enough, Pinterest came to my rescue.

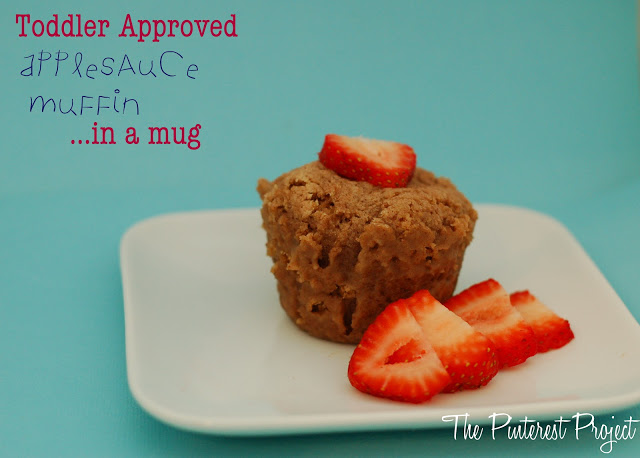
After my success with the banana chocolate chip muffin, I went ahead and created a toddler approved and healthy applesauce muffin recipe for the kiddos in your life.  You're welcome!

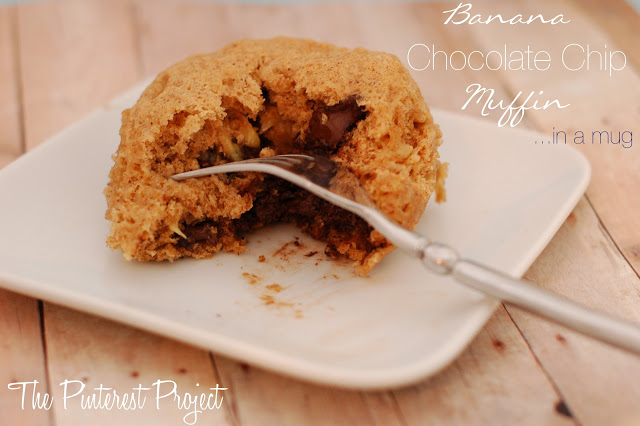
This banana muffin recipe was adapted from Flavorator, and I added dairy free chocolate chips, but you could omit those and add nutella, blueberries, or strawberries or whatever your little heart desires.  It's ridiculously healthy, has no dairy or refined sugar and with the addition of a small handful of chocolate chips, is sweet enough to make as a dessert.

Banana Chocolate Chip Muffin in a Mug
Recipe adapted from Flavorator

Printable Recipe

Ingredients:
  • 2 tbsp flax meal
  • 2 tbsp whole wheat flour
  • 1/2 tsp cinnamon
  • 1/2 (heaping) teaspoon baking powder
  • 1 mashed banana (mashed REALLY well)
  • 2 tbsp honey or maple syrup  **Reader comment - if using maple syrup, sweeten to taste.  Maybe start with 1 Tblsp and see how you like it.  She thought the syrup made it a little too sweet**
  • small handful of chocolate chips (I used dairy free)
Directions: 

Whisk together the dry ingredients in a small bowl. Set aside. Whisk together the wet ingredients in a small bowl. Add them to the dry. Mix until incorporated, but don't over-mix.

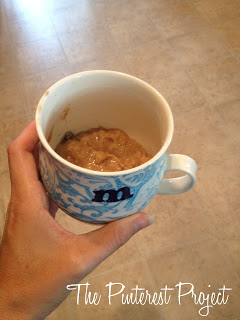
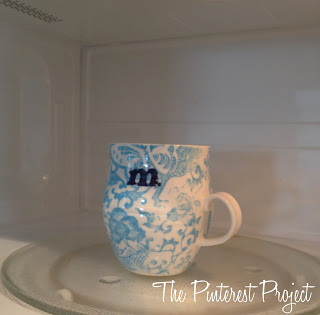
Spray your mug with non stick cooking oil.  Pour in the muffin mixture, and place in the microwave. Heat on high for 90 seconds.


Eat in the mug or let cool for at least 1 minute and gently drop onto a plate. 


My toddler approved recipe uses a strawberry applesauce, which does give it a little bit of a gummy texture - so feel free to use banana in place of the applesauce.  I also cut the honey in half and only used 1 tblsp.  If you haven't introduced your little one to honey yet, feel free to use maple syrup, or leave it out completely.  


Toddler Approved Applesauce Muffin 


Ingredients:
  • 2 tbsp flax meal
  • 2 tbsp whole wheat flour
  • 1/2 tsp cinnamon
  • 1/2 (heaping) teaspoon baking powder
  • 1/3 c.  strawberry applesauce, or regular applesauce (or 1 banana mashed REALLY well)
  • 1 tbsp honey or maple syrup

Directions:

Whisk together the dry ingredients in a small bowl. Set aside. Whisk together the wet ingredients in a small bowl. Add them to the dry. Mix until incorporated, but don't over-mix.

Spray your mug with non stick cooking oil.  Pour in the muffin mixture, and place in the microwave. Heat on high for approximately 1 minute 45 seconds.  Let cool for several minutes, then turn over and gently drop on plate.  

Serve!


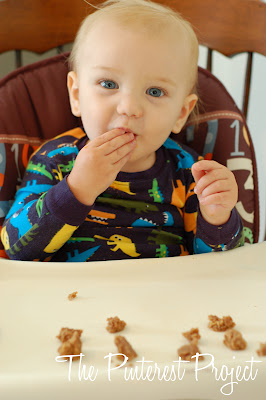
I loved serving this muffin to Beckett - it was healthy and with no added sugars - he totally scarfed it up!


Have you tried any "in a mug" recipes yet?  How did they turn out?


Advertising!

Happy Monday everyone!

Just a reminder that we are still accepting sponsorships!  Check out our ad page for more details!


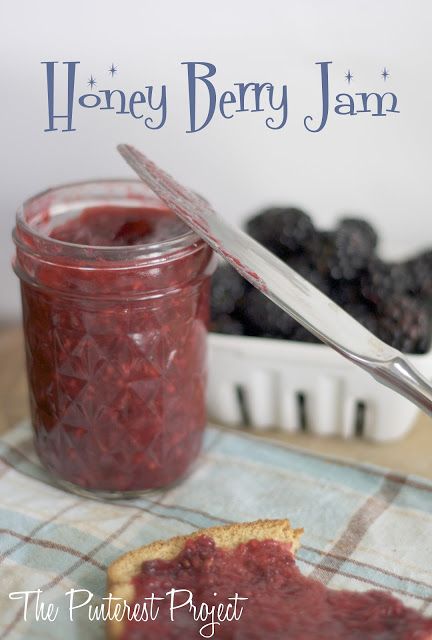
Honey Berry Jam

Honey Berry Jam
 
I know that y'all are super sick of canning so I promise this will be my last post on canning for a bit. Every time I write about canning I feel like I age anyway, at this rate I'll be 80 before I know it. I told you during my week of canning adventures there was some jam involved. Macie has started eating PB&Js for lunch a lot and after spying how much sugar is in jam I decided it was time to look for some alternatives.
 

DIY Natural Carpet Cleaner

So the other night, I was lying in bed - just starting to drift off to sleep when I felt something on my face.  Being the ever smooth, unruffled presence that I am, I started flailing about like a deranged octopus and shaking my head left and right as fast as I could.  Moments like these I am really glad I'm not on a reality show.  Talk about embarrassing.  Anyway, I grabbed my phone to use as a light source (because I'm SO 2012) and found - IN MY BED - a spider.  Granted, it was about the size of a fleck of pepper, but IT WAS STILL A SPIDER.

IN.  MY.  BED.

ON.  MY.  FACE.

Commence 25 minutes of heebie jeebies and shudders and flinging covers and sheets back to make sure there wasn't a big ol' mama spider and her herd of baby spiders doing a jig on my pillows.  I mean, you can't be too sure, right?

It's probably a good thing my husband was out of town that night for work, because I don't think he would have taken well to my banshee ninja moves and screeches.  I am happy to report though, no other spiders were found.

Ok, so what does all this have to do with carpet cleaner?  Honestly?  Nothing.  HA.  But come on, how do you segue into carpet cleaning?

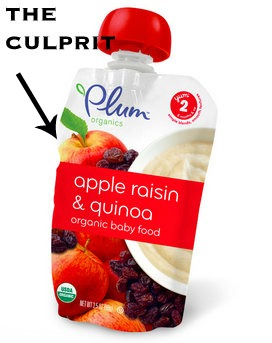
In any event, this is a phenomenal little secret recipe I stumbled across.  A few weeks ago, my 14 month old was eating one of those fruit squeezy pack thingies.  No, that is not the technical term.

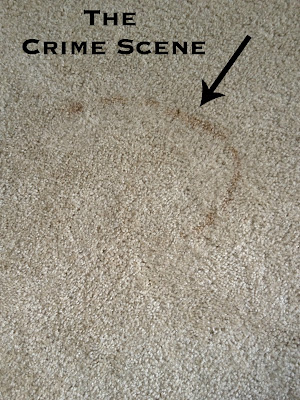
Enter Exhibit A:


Enter Exhibit B: 


Enter Exhibit C: 


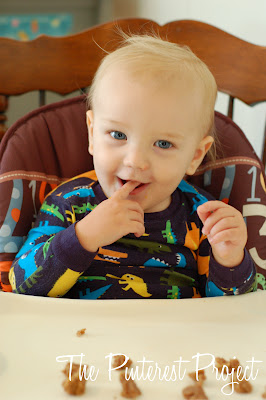
So there, I was - feeling dismayed over this spot on my carpet - if you can even call it a "SPOT".  It was big.  And arching.  Like a baby food puree rainbow.  I was not impressed.  Don't let that boy's cute  face sway you.  It was all his doing.  I mean, sure, I lost my mind for a moment and thought it was a good idea to let him walk around with a squeezy packet of baby food but - I mean - I can hardly be held responsible.  IT'S NOT LIKE I SQUEEZED THE PACKET FOR HIM.  (Though if I would have, I probably could have avoided this...)

I am pretty freaky about chemicals in the house.  I am kind of a nut about it really.  It drives my husband crazy because he wants all our household cleaners to be labled 'TOXIC' or 'MAY BURN YOUR FACE OFF'  and I'm all, let's buy cleaners that say 'CAN ALSO BE USED AS A BEVERAGE'  or  'ANIMALS LOVE US'  However this is one area where I win out.  And so we have a cabinet full of earth friendly, baby friendly, lungs friendly cleaners.  But y'all.  When it comes to the carpet there doesn't seem to be many products that don't have a skull and crossbones on the front.  And I NEEDED to get this stain out, so I put Beckett down for a nap, put on my gas mask and gloves and got to work.  I scrubbed and scrubbed.  I waited.  I vacuumed.  I did it again.  And again.  In fact, that picture above is actually after several applications of highly toxic and chemical filled carpet cleaner.  

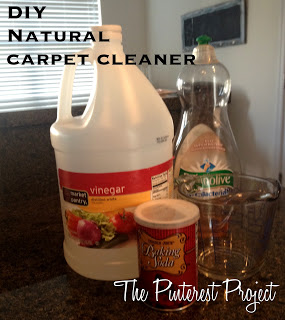
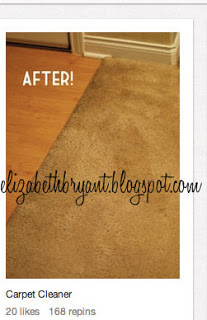
So I finally got smart and remembered I had seen a pin on Pinterest for a natural carpet cleaner using products from your cabinets.  Enter this fun instructional blog post, from ElizabethBryant.blogspot.com


She uses baking soda, hot water, white vinegar and clear dish soap to remove OIL stains from her carpet.  I figured if this magical concoction could remove oil, surely it must remove baby food.  

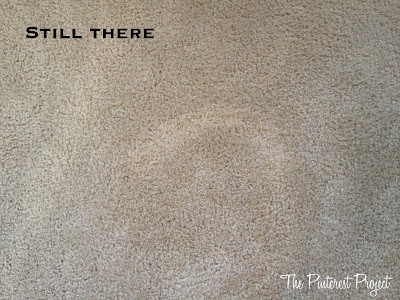
So I gave it a go.  Here it is after one application:


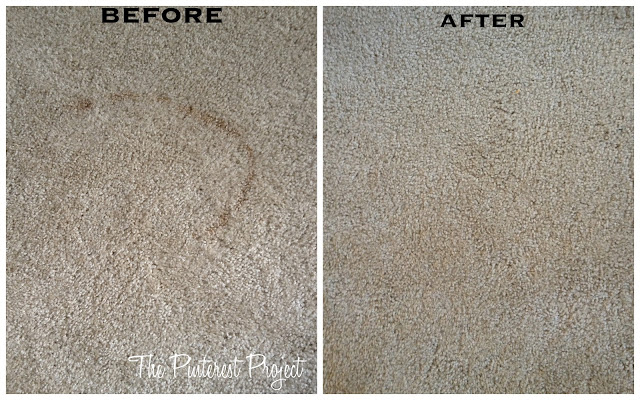
Can I be honest and tell you that my dramatic side almost got the best of me here?  After rolling around on the floor wailing, "Noooo, nooooo" I realized that perhaps I should try one more application and see if that removed the stain in its entirety.  And I'm happy to report that it is GONE!  


Moral of the story?  Don't let spiders crawl on your face.  Don't let babies eat squeezy packs in the living room.  And MAKE YOUR OWN CARPET CLEANER.

Truth.  

Make sure to check out Elizabeth's post for her step by step instructions!  You're welcome.


Hot Pepper Spreading Goodness

Remember last week when I told you all about my canning marathon? Yeah, there has been no more canning in our house this week, I decided it was time for a canning break - it was that or I would start twitching at the sight of tomatoes and that could be awkward. This weekend Allen had me rearrange all of the storage for my jars and canned goods because for some strange reason he didn't think that storing them on the counter all year was a good idea (he's so picky!) Now the canned goods and canning supplies are all pretty and organized and ready for use. YAY!

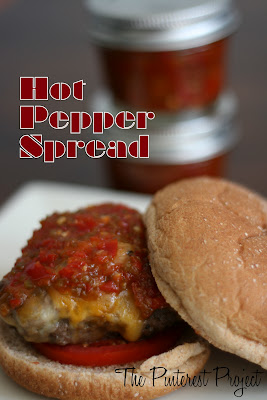
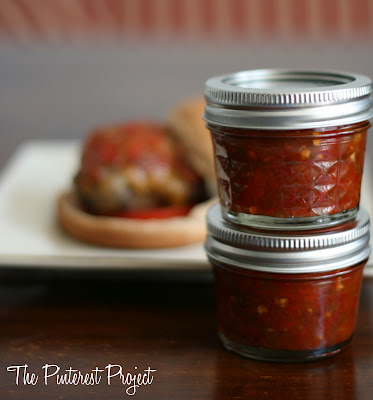
One of the things that I canned last week I decided to call Hot Pepper Spread because I really didn't know what else to call it. Growing up in New Jersey, ordering a hoagie with hot peppers meant getting a sort of spread. It's hot peppers that are all chopped up and spread on your sandwich and is super tasty.  For some reason when I moved south, the spread disappeared. It doesn't seem to exist here. After getting a whole mess of hot peppers and trying to figure out what to do and of course, going through all sorts of pretty pictures and rabbit trails on Pinterest, I decided to give the hot pepper spread a try. 

Can I just tell you how much I love this stuff??? It is so good. It has the right amount of heat but it doesn't knock you over and kill you. I made myself a super tasty burger and spread the hot pepper godness all over the burger and ummm.... HEAVEN! It gave my burger the heat and bite and sheer yumminess that I wanted. I seriously want to put this stuff on everything. It's going to be my downfall though because I only made a small amount since it was a total experiment. Now that I know it works, it may be time to find Peter and have him pick me a peck of peppers!!!

Hot Pepper Spread - printable recipe
makes 2-3 1/4 pint jars

1 3/4C chopped hot peppers (I used cherry peppers, long hots and a couple habaneros) 
1 C cider vinegar
1 Tbsp salt
1/2 C sugar  (I want to lower this a tad next time)

Prepare your 1/4 pint jelly jars and prepare your water bath. Chop all of your hot peppers (I used a food processor). Put the hot peppers in a small saucepan and add the salt. Let the peppers sit for about an hour. After the hour you will see a lot of the liquid has left the peppers. Add the vinegar and sugar to the pot and simmer for about 30-45 minutes. The liquid will get thicker and almost to a syrup consistency.  Ladle into a hot sterilized jars, leaving 1/4" headspace. After wiping the jars, place lids and bands on and process in the water bath for 10 minutes.

So good people. So good.


Easy S'mores Cookies

I don't know what's going on lately, but I blame all of the people I follow on Pinterest. Seriously, y'all have been pinning some YUMMY looking food items. I was starting to feel self consciously aware that all my repins lately have been food related. But just when I make the decision to STOP repinning food, something else amazing pops up in my feed and I just.cant.stop. 

So it should be no surprise that when I went back to my "Eat" board to find the original pin of the recipe I'm sharing today, I got completely sidetracked and started drooling over some yummy snack ideas. (Yes, peanut butter popcorn I'm talking to YOU) It took me a minute to get myself back on track and I'm glad I did because I'm excited to share another yummy and easy cookie recipe.

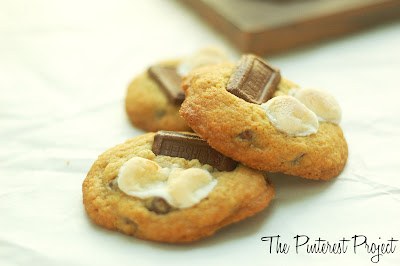
You might remember last week's post about Desserts for the Deserving and the Peanut Butter Chocolate Chip Shortbread I made. This is the second cookie recipe I put in my box to be mailed.  A really tasty cookie dough complete with crushed graham crackers, mini chocolate chips, mini marshmallows and Hershey chocolate bars.  YEAH summer.

The recipe comes from Intimate Weddings


S'mores Cookies


1 1/2 cups flour
1 cup graham cracker crumbs (about 6-7 graham cracker cookie sheets)
1 teaspoon baking soda
1 teaspoon salt
1 cup (2 sticks) butter, softened
3/4 cup sugar
3/4 cup brown sugar
1 teaspoon vanilla extract
2 eggs
2 cups miniature chocolate chips
1 1/2 cups mini marshmallows
2 Hershey bars, chopped

Preheat oven to 375 degrees.

In a medium bowl combine the flour, graham cracker crumbs, baking soda, salt. Whisk together. In a separate larger bowl beat together the butter, sugar, brown sugar and vanilla until creamy. Add the eggs one at a time, beating well after each addition. Slowly beat in the flour mixture until smooth. Stir in the chocolate chips. Drop by rounded tablespoon onto ungreased cookie sheet.

Bake for 8 minutes, and remove from the oven. Push 3 to 4 marshmallows and a few pieces of hershey bar into each cookies. Return to the oven and bake an additional 3-4 minutes until fully cooked. Cool cookies on a wire rack.
Makes approximately 4 dozen cookies.


Advertising!

Are you interested in sponsoring...


We are now accepting sponsors as we roll out new pricing, new incentives and a new way to buy ads - through Passionfruit Ads!  We love them and we think you will too.  

Here's the important info about us!


  • 70,000+ Monthly Page Views
  • 650+ Subscribers through GFC, HelloCotton, RSS, Bloglovin’ and Feedburner 
  • Twitter: 338+ followers
  • Facebook: 1,430 +

All ads will be approved before they are posted on the blog.  We are so excited to have the opportunity to work with you - thanks for considering us, and please feel free to send any questions to [email protected].
Thanks for your interest!

We're Leaving On a Jet Plane... UH OH


A couple weeks back I mentioned how my family had to make a trip to New Jersey, what I didn't tell you was that we had to fly. This is where the hyperventilating started to come into play. While we were living in Maryland we used to go to New Jersey to see my family on a fairly regular basis and the car would be weighed down with crap. We would have so much stuff to bring that I would make a list for a two day trip. Ridiculous. Since I can't pack the plane full of all of our things (dumb regulations and bag fees), I started to get really worried about what I needed to bring and more importantly, how to entertain an 18 month old child who doesn't like to be confined. Hello Pinterest. I started searching for pins about traveling with kids just hoping to come up with one thing and you know what, I did!!! I read a few blogs on things to pack and what to do to entertain kids and honestly, I got even more frustrated and more confused. One person said to pack a stroller, one person said don't pack one because the airline with trash it (no thanks), one person said to get a carseat wheely thing (more on that later) -- this girl was exhausted and we hadn't even flown yet! It was time to figure this mess out. 
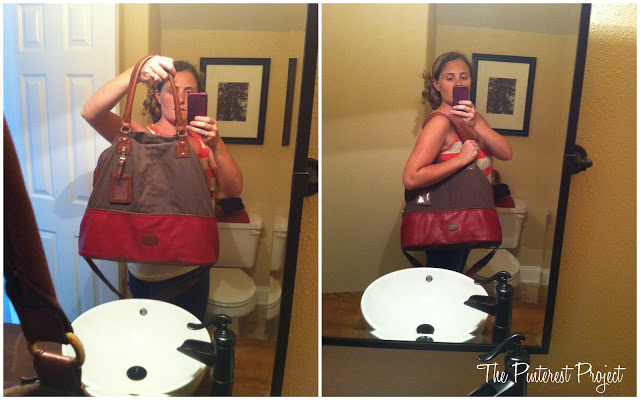
After asking for suggestions from my trusty facebook friends, I started to read what the blogs said again, trying to keep in mind what Macie likes and hates. I grabbed my faithful H&M bag because well, it's giant, and got to work. That is my first tip- Ditch your cute purse for the plane - you don't need it and you do need a portable toy box for the tiny traveler. My H&M bag is honestly the best ever. It's huge, it's light and it has one giant pocket with two good size side zip pockets so I can put all Macie's stuff in there super easy and leave the zippers for my stuff. I also don't feel like I'm carrying a diaper bag when I carry it, so that's a plus.


Notice how giant it is??? Please don't notice my weird faces, as though I don't know how to use my cell phone camera. 

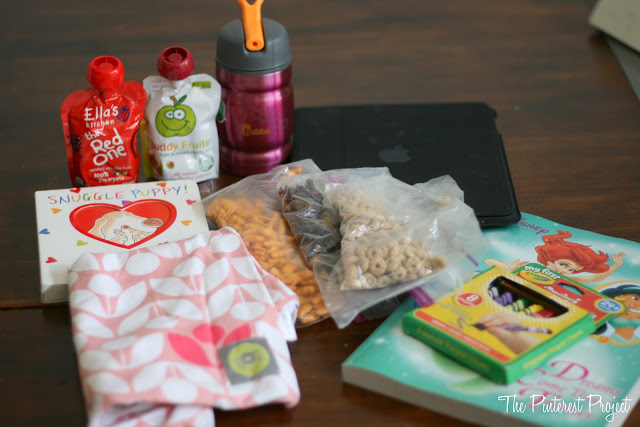
Okay, I have the bag - now what? Fill it with food. No joke peeps - I brought along so many snacks, I was a walking grocery store. I packed fruit snacks, goldfish (well, organic sea monsters to be exact), Trader Joe O's, raisins, dried cranberries and a couple fruit smoothie packs. On the way home I threw in grapes too because my mom had some. Macie was loaded down with snacks. I also packed some crayons, a coloring book, a few of her books to read and I filled Allen's laptop with her favorite shows like Cat in the Hat, Martha Speaks and Super Why (for my own personal torture). I brought an empty cup for Macie because you can't bring liquid through security and then three night diapers (for extra security, she was sitting on MY lap the whole flight), her changing pad, wipes and a wet bag that I had picked up at Buy Buy Baby on an impulse. Let me tell you, go get one, it came in handy.


I know what you're thinking right now "flying isn't that hard, you have plenty of supplies and you have Allen to help." Yeah, that's what I was thinking too until disaster struck. Our flight was at 9:15am so we got up early, packed the car, rushed to the airport and parked. I had contemplated the stroller versus my ergo baby carrier until the last minute, but finally decided to give the ergo a shot. I didn't really want to haul a stroller and my mom has one at her house. Macie got in the ergo like a champ and off we went to the parking shuttle. Because airlines want to make life a little harder when you have a child, you have to check in at the airport and not online (gee thanks) so we checked in then it happened. Someone strolled by us with their child in a car seat wheely thing and Allen looked at me and said the fateful words "we don't have the car seat."
I wanted to die. 
He decided to run back to the car and get it and I'd go through the security line with Macie. He handed me the suitcase (yup, I packed for all of us in ONE carryon) and his computer bag. I already had my trusty H&M bag and Macie in the ergo - I was loaded down. Luckily there was a very nice man behind me who threw my carry on on the belt for me. They didn't make me take Macie out of the ergo, which was awesome. They made me push on her to prove she was a real baby (hello, she was talking to them) and swabbed my hands for explosives but I didn't care. As long as she was confined, I was happy. After being cleared that I wasn't a bomber and Macie really was a baby, we were off to the gate to wait for Allen. After about 30 minutes, and a preliminary announcement that we would be boarding soon, I was getting concerned and called him. Nothing. GRRRR. Macie was getting antsy and I didn't want to let her loose in the gate so we went walking and ran into Allen.... without a car seat. He had taken the shuttle back to the parking deck, got the car and realized that he had put his keys and phone in his computer bag. Yeah, the same bag he had handed to me. Nightmare! Luckily after a panicked call to my mom, a friend of mine's mom came through in the clutch with a car seat for my parents so we didn't have to miss our flight.  Yay Lynn!!! All of this to say, you can get through security alone. I didn't think it was possible until I had to do it. 

Here's my lesson on boarding. Flying is no longer a fun adventure. It's sort of like herding cattle and children are just thrown in the mix. They no longer let you board early if you have a small child so it was another plus for Macie in the ergo. I didn't have a stroller to deal with and Macie was strapped to the front of me so it was easier to get her through the aisles of seats filled with people. 

The flight to Philadelphia was smooth enough, Macie ate a TON of snacks, made friends with every person around us and found it super entertaining to open and close the window shade - over and over and over. On the flight back - that was a different story. Just like airlines no longer let you board early, they won't guarantee families sit together or even try to make it happen. After three gates changes and two delays and no dinner for Macie due to mass overbooking and flight issues, Allen and I ended up two rows away from each other. Guess who was blessed with the lap child? Not Allen. Macie ate all of her snacks (remember the grapes and raisins?? yeah, don't pack those) and had buckets of water. This was not the smartest idea. She had not one, but two blow out diapers during our flight. It was the second one that made me glad for the wet bag (remember I mentioned that??) Her diaper had leaked - the night diaper - and her jeans were wet and gross. I was able to throw them in the wet bag and move on. Macie wasn't super interested in the books I had brought or the laptop full of movies, but she was all about the snacks and watching the people around her and her crayons.  She played peek a boo with the saintly girl in front of me for a little while too.

I feel like I let out a giant sigh of relief when we got off the plane. I learned a few things from this little adventure. The ergo was a GREAT decision (I need to give Allen credit for that decision in the end), it saved me fighting with Macie and a stroller. Snacks are a must have. I would suggest laying off the raisins because I'm pretty sure they were my downfall and led to the diaper blowouts. Speaking of diapers, the night diapers really were a good call because Macie drank so much water. When you do have to change a diaper in a plane, you don't want to bring the big ol' bag with you. The bathrooms aren't going to fit you, your squirmy child and your big bag. Bring a little diaper changing kit with you and take that into the bathroom. The last thing I learned is that flying with a toddler is possible. I'm not saying that I want to do it all the time, I'm not insane - but it's possible.

Have you flown with a toddler? How'd it go? What did you learn? Tell me your secrets for my next flight!!!

PS - Sorry this is the world's longest blog post. I should give you all an award if you if actually finished it!!

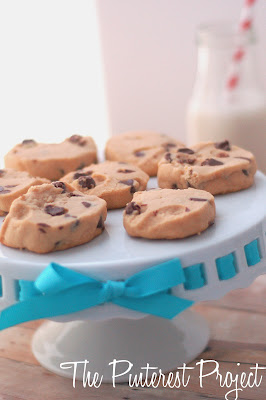
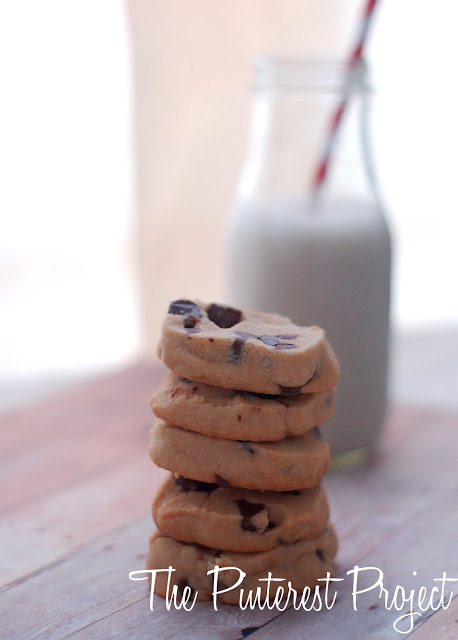
Peanut Butter Chocolate Chip Shortbread

If there is any combination in my life that I love - it's peanut butter and chocolate.  There is definitely no better flavor combination in my book and if it's got those two ingredients in it, you KNOW I'm going to want it.

Earlier this summer, I signed up to participate in a program called Desserts for the Deserving, with Amanda from I Am Baker and some other really amazing bloggers and volunteers.  The premise of the program is simple - people nominate someone in their life who is struggling and could use a smile or a 'pick me up'.  Then all of the nominees are paired with volunteers.  As a volunteer, you agree to put together some yummy desserts and mail them to the nominee.  A simple way to tell someone that someone is thinking about them, and a perfect stranger (in my case, on completely opposite sides of the country) wants to help make their day a little brighter.

I was paired up with a single mom, which completely made my day.  Since I was a single mom for 10 years, I know just how painful and lonely a road that can be.  I know how overwhelming life can get, and I was SO excited to be able to put together a care package of goodies for this sweet woman.

I got to work perusing the internet, and of course Pinterest, for ideas.  Some of the other bloggers and volunteers were making AMAZING and beautiful decorated sugar cookies.  I've done the sugar cookie thing and well, let's just say I'm not a sugar cookie queen.  I can manage a batch ok - but I don't have a professional hand, and I knew that I would never measure up in that department.

I'll be sharing a few recipes on the blog over the next few weeks of the cookies and goodies I included in this package, and first up are the world's most amazing shortbread cookies.

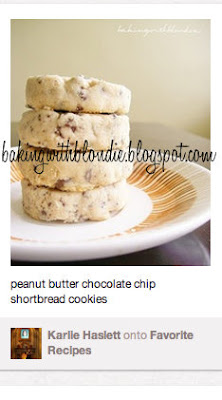
What's not to love about shortbread?  It's buttery and delicate and oh so good.  Add to that peanut butter, sea salt and milk chocolate chips and I think I've died and gone to dessert heaven. I saw this pin from Baking with Blondie, by way of The View from the Great Island and it went on my "to bake" list immediately.

This recipe takes only a handful of ingredients, barely any effort, and can be chilled and stuck in the refrigerator for any last minute dessert emergencies that might arise!  This cookie is flaky and buttery and I could eat the entire batch.  Which is why it's a good thing I had to mail them all out to someone else.  

Peanut Butter Chocolate Chip Shortbread Cookies

1 stick, (1/2 cup) unsalted butter, room temp 
1/3 cup creamy peanut butter
1/2 tsp vanilla extract
1 1/4 cup all purpose flour  
1/4 cup confectioner's sugar
scant 1/2 tsp sea salt
3/4 cup milk chocolate chips 

Cream the butter and the peanut butter together in a stand mixer, with a hand mixer, or a wooden spoon.  Beat in the vanilla. Whisk the dry ingredients together and add to the butter mixture.  Mix until the dough comes together.

Stir in the chips, and turn the dough out onto a piece of waxed paper.  Gently pull the dough together and form it into a log. Roll it up in the paper, smoothing the shape as you go.  Twist the ends securely and refrigerate for at least a couple of hours.

Slice the log into slices with a sharp knife. Not too thick, not too thin, about 1/3 inch. Bake at 325 for about 12-14 minutes.  The cookies will  not be browned, and they may look undone, but don't over bake.  One of the joys of shortbread cookies is that they fall apart and melt in your mouth. Let the cookies cool on the pan for 5 minutes before transferring to a rack.


So tell me - are you a peanut butter and chocolate fan like me?


Canning and Slacking

Friends, it's official. I have lost my mind and I blame canning. I have lost track of time, and days, of everything. At this point I wish I were exaggerating, but trust me - I'm not. I literally forgot what day it was. I'm not sure how it happened, but I have walked around all day thinking it was a different day. The one thing I can tell you is what I've canned (probably because it's all I've done). As of today the tally is:

18 jars of salsa
9 jars of berry jam with honey (no sugar) --- you'll hear more about that later
11 jars of ketchup
6 jars of chopped tomatoes
6 jars of tomato sauce
2 jars of hot pepper spread stuff (more on that later too)

My brain is mush. I actually dreamed about canning last night. I think it's a sickness. I feel like it's time for me to slack a little bit (or clean my house, but whatever). Due to my need to slack off and browse Pinterest for awhile, and the fact that I am completely messed up on days - I decided to share with you a little printable I did that I want to frame and put up in the house somewhere. 


Maybe this is to just make me feel better about my wanting to slack, but seriously - if you can't slack off in summer when can you slack?? Friends, I need you to be with me on this one. Smile and nod for me. Thanks for that. :)

If you want to join me in my celebration of slackness, here's a printable for you too. Happy Slack Day!


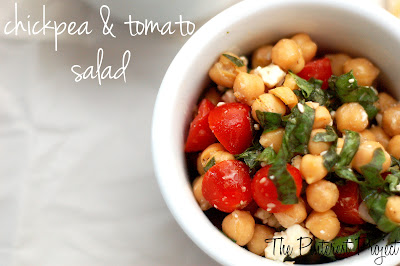
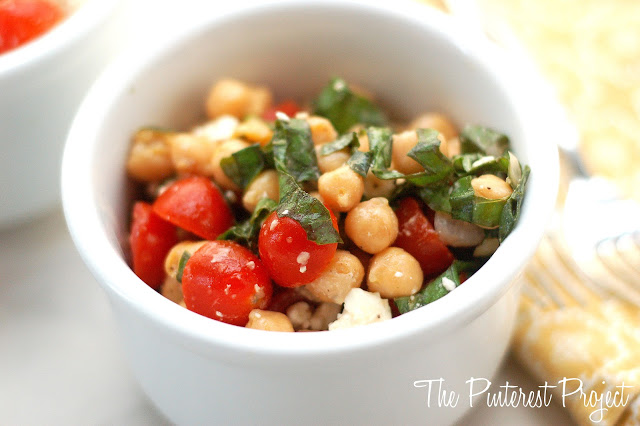
Chickpea & Tomato Salad

I'm going out on a limb here and stating the obvious.  It's hot.  It's been hot here, and I know it's been hot just about everywhere else.  I don't know about you, but when the temperatures are pushing 100 degrees, I crave fruits, veggies and salads.  

(Of course, I'm no saint - I also crave ice cream and cookies.  It's true...)

I'm just saying I'm much more inclined to bust out a good salad recipe in hundred degree heat than I am when it's fall and the weather is cool, and I can pick apples, sip hot cocoa and snuggle up by a fire.  I know I'm not the only one out there.  Anyone else ready for fall yet?

I have a deep, deep love for chickpeas.  I don't know why - but it's one of the few foods my husband and I disagree greatly on.  He loathes them, unless in hummus form.  I, on the other hand, think they are amazing little nuggets of yumminess.  Yes, I did just say nuggets of yumminess.  I LOVE them in salads - and summer is the perfect time to try out a chickpea salad recipe. 

This is a very quick and easy salad recipe - I already had all the ingredients on hand, and you probably do too!  

I found this recipe on Green Lite Bites.


It called to me.  Chickpeas, tomatoes, basil...what more could you want?  I did end up throwing a little feta cheese in since I had it on hand, but that's totally optional.

Chickpea & Tomato Salad

  • 1 can chickpeas, drained and rinsed
  • About 1 pint grape tomatoes, halved
  • 25 large basil leaves, chopped
  • 1-2 cloves of garlic, minced
  • 1/3 c. feta cheese, crumbled (optional)
  • 1 tbsp red wine vinegar
  • 1 tbsp apple cider vinegar
  • 2 tsp olive oil
  • 1/2 tbsp honey 
  • pinch of salt
Toss all ingredients together and chill for at least 20 minutes, allowing all the flavors to merge.


Hit or Miss Monday

Hi hi hi!  We hope you all had a lovely, relaxing weekend full of friends, family, fun and Pinterest.  Jamie and I got to have a fun little shopping trip today sans children, thanks to some good husbands who stayed home and let us have grown up time.  It's amazing how a few hours away can make you feel almost human again ;)

On to this week's Hit or Miss picks -

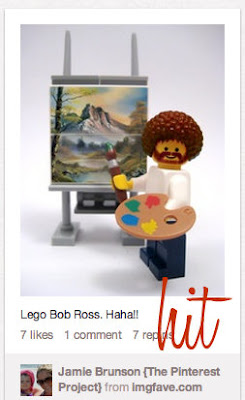
Jamie's Hit:


i have a confession. i used to want to be like bob ross. i loved him. i used to stay home from school sick and watch him paint his "little trees" and dream of painting like him. i feel like it's somehow fitting that he be immortalized in legos. awesome.


And her Miss: 

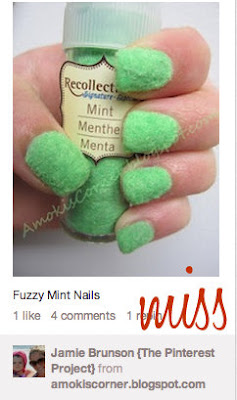
just in case you want to look as though your nails are growing a new species. this is so weird. who wants fuzzy nails?? this is a bad joke. it has to be. please tell him it is... please!!


And my Hit:

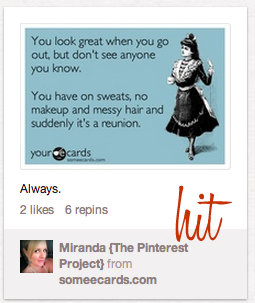
Why does this always happen?  It's always when I tell myself I'm just making a quick trip to the store and won't see anyone that I do, in fact, run into EVERYONE.  And when I make an effort, there's not a soul around to appreciate it!


And my Miss:

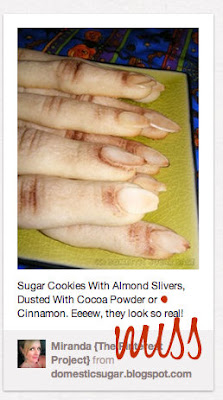
Ok, these ARE for Halloween (at least I'm hoping!) and so they are kind of a "hit" in that they are realistically gag worthy and disgusting.  But honestly, I can't get over how realistically gag worthy and disgusting they are, so I have to make them my miss.  I kept staring at them, trying to figure out what was going on here.  So realistic and so so so gross.  I have to give props though to the mastermind behind this.  Well done.  I am officially revolted.


(Also, as a side note - how hysterical was Jamie's Hit?  I am going to tease her for the rest of her life about wanting to be Bob Ross.  She is withholding info though - she confided in me that she also owned a little easel and some Bob Ross paints.  I am STILL laughing just imagining it...)

What did you all see this week?


Homemade Ketchup... yes please

Macie has recently become addicted to dipping. She makes me crazy with it because if she has a potato in her hand, she knows it's naked. It needs ketchup. She even goes as far as to pretend to dip it until her mom wises up and realizes what she wants. I like ketchup but it's one of those foods that has a label that  makes me cringe. Have you ever looked at the ingredient list? Don't - it's scary.

 Remember how I told you last week that I got a whole big ol' box of tomatoes from the farm stand?? Yeah, I canned a ton of tomato sauce and still had more tomatoes left. I was thinking about making some salsa but that meant another trip to the store and well, that was not happening. What does someone do with tons of tomatoes that need to be turned into something delicious??? Look at recipes. I have a fun little canning board on Pinterest and that's when I saw it...


Ketchup. I had pinned a couple different recipes but I had also just gotten my handy dandy Food in Jars cookbook. After reading a few different recipes I decided on the Food in Jars recipe... mainly because I had all the ingredients and remember - I am against extra trips to the store. I made a half recipe to sort of test it out.

Canning is all about hurry up and wait and then hurry up again. Making ketchup is no exception. Get all your tomatoes cleaned, cored and quartered. Throw them in a pot with some bell peppers and onions and cook them and wait. Grab your food mill or sieve and push the whole mess through to get rid of the seeds and skin (you don't want that in your ketchup - well maybe you do, but I don't). Add all the other ingredients to the pot and simmer and wait... again... for a long time. Once it's nice and thick - hurry up and can it... and try not to eat it all. 

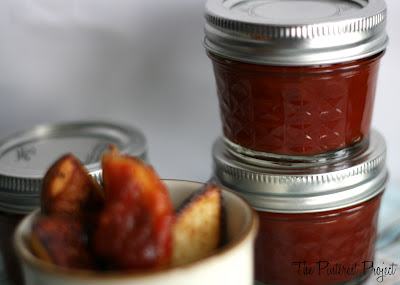
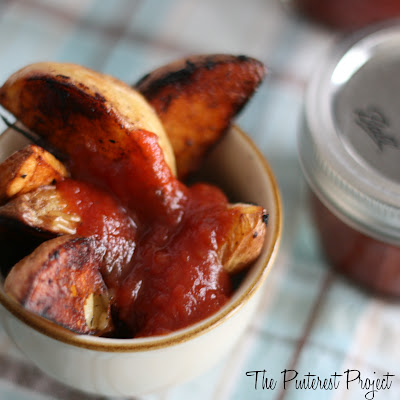
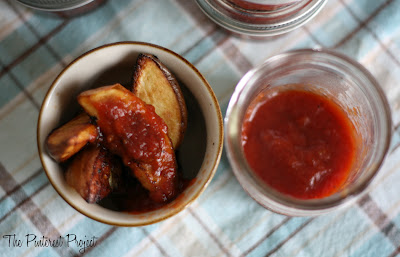
I made some roasted potatoes, you know - to test the ketchup - and it was so good. Macie ate it, I ate it, Allen ate it. I almost didn't get any pictures because we were eating them too fast.  It doesn't taste like Heinz, it tastes way better. This recipe doesn't make a lot, so I've been considering the jars like little pots of gold. Luckily I went to the farm stand today and they had THREE boxes of tomatoes for me. People, I am up to my eyes in tomatoes -- I see some more ketchup in our future!

Homemade Ketchup - Food in Jars


4 lbs chopped tomatoes
1/2 C chopped onion
1/4 C chopped red bell pepper
1 C cider viegar
1/3 C brown sugar (a little less)
1/2 tsp celery seed
1/4 cayenne pepper
1/2 tsp whole cloves
1/2 tsp mustard seed
1/2 tsp allspice
1/2 cinnamon stick, crushed. 


Prepare a boiling water bath for 3 half pint jars. Combine the tomatoes, onion, and red bell peppers in a large pot. Bring to a boil and then reduce temperature to medium. Cook until vegetables are soft - about 45 minutes. Push the mixture through a sieve or food mill and discard the seeds and skins. Return the pulp to the pot. Add cider vinegar, brown sugar, celery seed, and cayenne pepper to the pot. Combine the cloves, mustard seed, allspice and crushed cinnamon stick in a cheesecloth bundle or tea ball and add to pot. Simmer over medium-low heat, stirring regularly until the mixture has reduced by half and is very thick. This takes quite awhile. When the ketchup is finished cooking, remove bundle and discard. Ladle the ketchup into the prepared jars, leaving 1/2 headspace. Process in water bath for 10 minutes. 


Add to... everything!


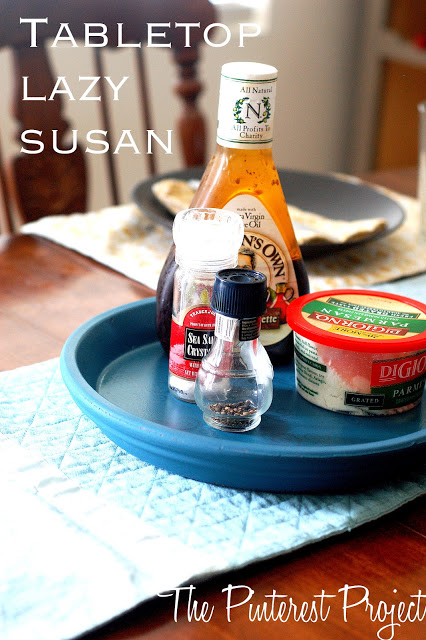
DIY Tabletop Lazy Susan


We are big on family dinners at this house.  We eat out only about once a month or so, and make sure that everyone here at the house sits down together to a family dinner.  No exceptions!  Sometimes we have a full house - if my stepsons are here, there are 6 of us around the table, including the baby.  On nights like that, it can be chaotic to say the least.  Pepper and salt are flying around the table, parmesan cheese is everywhere...

A Silhouette with InkEffects


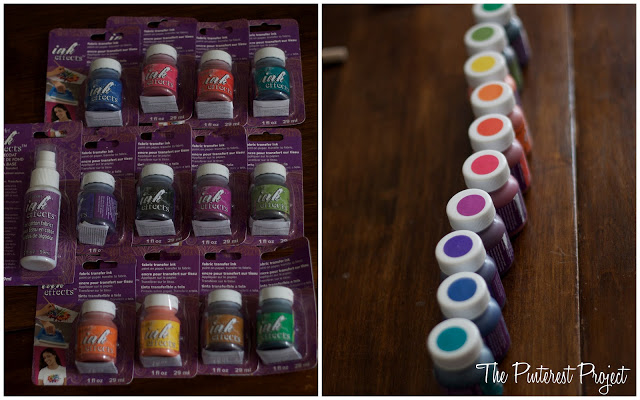
As many of you know, we recently moved and I've had decorating on the brain. If you follow me on Pinterest you know that I have gotten a tad obsessed with Macie's room in particular. I've been pinning things like I'm a millionaire ... a girl can dream right?? One of my big ideas for her room as been a gallery wall. I love the idea of all sorts of different pictures and frames being all eclectic and fun on her wall. It was this eclectic thinking that hit me when I got an awesome box of goodies in the mail. Don't you love when you get fun mail? I do. It's always way better to get new art supplies in the mail rather than bills and cheesy ads. Anyway - back to my fun mail. DecoArt sent us their new product to try, InkEffects and people, it's so cool. It will be sold starting next week at Jo-Anns and yeah, you're going to want to try it. They sent their full line of colors and their basecoat spray. I have so many ideas for this stuff now that I've had a chance to work with it. 

I'm going to be straight with you - I was WAY WAY nervous about this project because this product requires a little bit of a learning curve and I'm more of a jump right in kinda girl. Heed my warning - fight the urge, don't jump right in. You'll be so much happier if you test this bad boy out first. It's so worth it. The basic principle of InkEffects is that you can paint something on paper and let it dry and then iron the painted picture onto fabric and BAM - custom fabric/design/art/project!

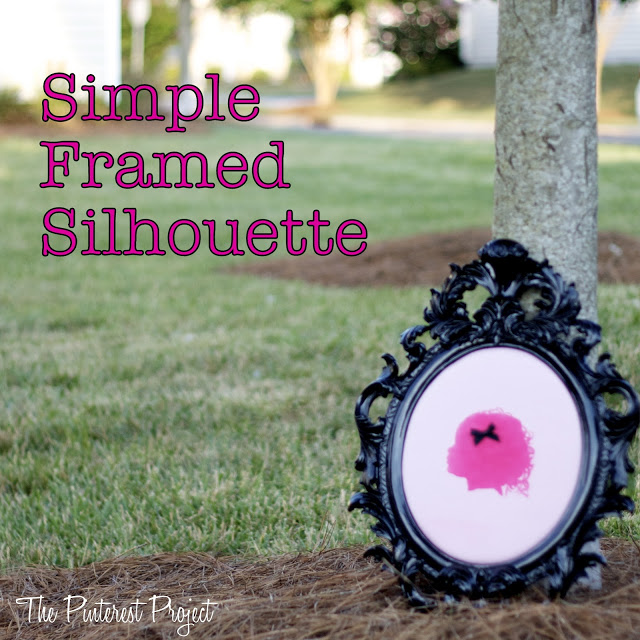
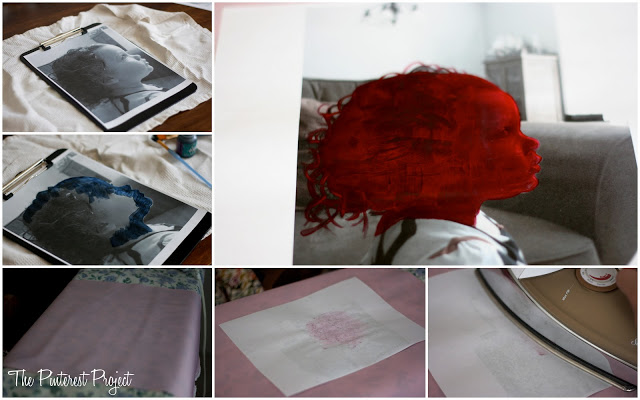
Because I have been on the eclectic art gallery wall kick, I decided to make a silhouette picture of Macie. I have been eyeing a few on Pinterest and all of them seemed to take a lot of steps. Friends, InkEffects made it SO much easier. All you need is some fabric, a picture, DecoArt InkEffects, a paint brush, an iron and a frame. 

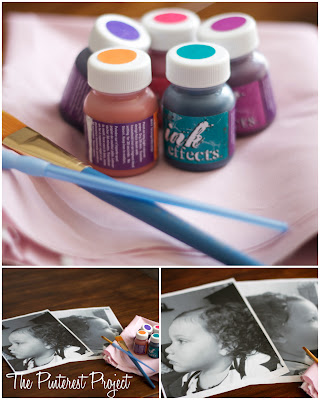
I took a few cute pictures of Macie while she was zoned out watching TV (don't judge) and printed them out in black and white. I had picked up some pink fabric on clearance at Jo-Anns that didn't have any cotton in it, but if it had been over 30% cotton, I would have needed to spray it with DecoArt InkEffects' basecoat for cotton fabric. After deciding on what color I wanted the silhouette to be, I painted the picture of Macie. 


I put a couple coats of the paint on the picture to make sure it was nice and bright and let it dry (In the picture above, the blue paint was my first attempt). After the picture was dry - and saying a little prayer - I got the iron out and laid the picture onto the fabric face down and ironed away. The instructions said to iron the fabric for 30 seconds and to make sure that you keep the iron moving. This is where I had hit my snag during my trial run. I only ironed for 30 seconds on a lower heat setting because I was nervous. The image was dull and didn't fully transfer so I decided to try it for longer. After about a minute and a half of ironing, making sure to move the iron slowly over the image, I carefully peeled the paper off fabric and exhaled. Perfect!!!


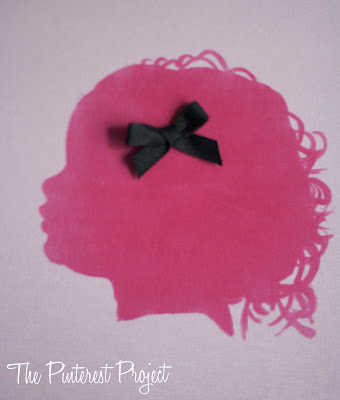
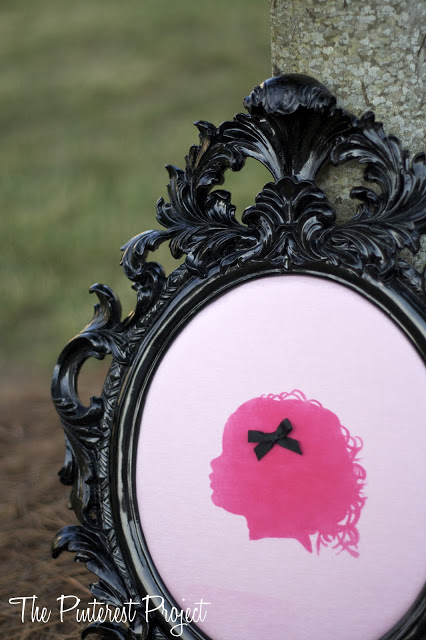
I added a little black hair bow to the silhouette because Macie was wearing one in the picture and I wanted to add a little something to the image. After a couple of stitches for the bow, I framed her little face in a black ornate frame I happened to have lying around and ...  I LOVE IT! This is the perfect start to Macie's eclectic fun wall of art. What do you think? What ideas do you have for InkEffects? What would you do?


If you want to follow DecoArt and see some of the fun things people are doing - you can follow them on PinterestFacebook and YouTube ...  I'm sure you know our favorite! 

**We wrote this post as part of a paid campaign with DecoArt and Blueprint Social. The opinions in this post are our own.**

PS - Check out some of the other great projects that have been done with InkEffects!!


Button Statement Rings

I'm kind of big on change.  Up until I got married, I'm not sure I spent more than a solid year of my adult life in one house/apartment/condo - I enjoy things being different and fun and new and exciting.  Which is why it's kind of funny that I married my exact opposite.  My husband is a routine guy.  He likes predictability and routines.  He rarely ventures off the path that works for him.  For example?  Just about every morning since we got married, his breakfast of choice has been blueberries.  SERIOUSLY.  Just blueberries.  Sometimes he'll have a breakfast bar, sometimes an english muffin if we have them, and for awhile when I was making my smoothies every morning, he'd have one of those too.  But 90% of our married life has involved my husband having blueberries for breakfast.

I, on the other hand, get on "kicks".  There was my oatmeal and fresh fruit kick.  My toast with peanut butter and bananas kick.  The smoothie kick.  The english muffin kick.  The cereal kick.  You see where I'm going?  I need to change it UP.  I don't want it to be the same!

This applies to my jewelry as well.  I think we are all aware by now that I love accessories.  The more the better in my book - but since I'm always trying out new and trendy styles when it comes to jewelry, it doesn't make sense to spend a lot of money.  Investing in a piece that is classic and can be worn for years to come is one thing - but a chevron necklace is another.  Right??  


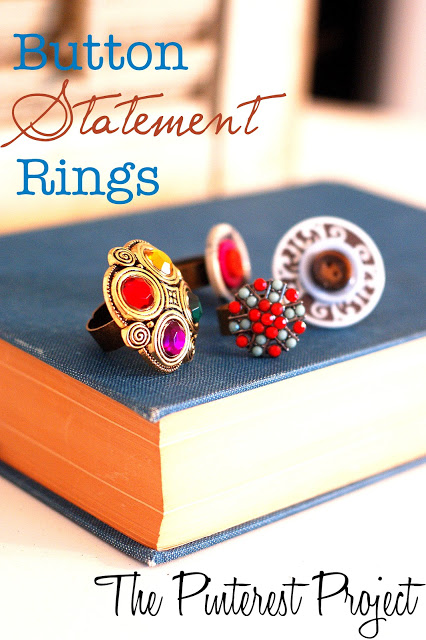
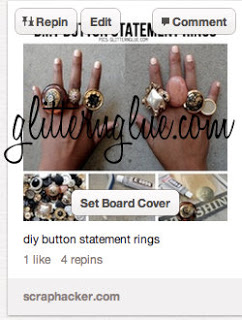
I love the statement jewelry trend that's been around for awhile.  The big, oversized and sometimes slightly gaudy pieces are right up my alley.  I think that's why the button statement ring pin I stumbled across got me so excited.  You can check out this tutorial from Glitter 'N Glue - but it's pretty simple.  


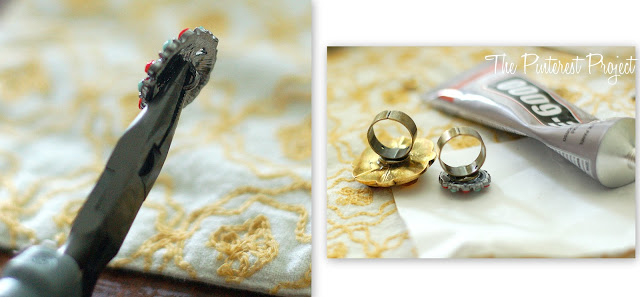
I went to JoAnn's and picked up a pack of 8 rings with the flat tops for $3.19.  Then you'll need decorative buttons and some really powerful glue.  I used E6000.  

You'll want to use some pliers and remove the button hook from the back of the button.  I didn't try to remove it from anything plastic, but I'm assuming that won't work so well - so stick to metal.  The little hooks come off surprisingly easy.


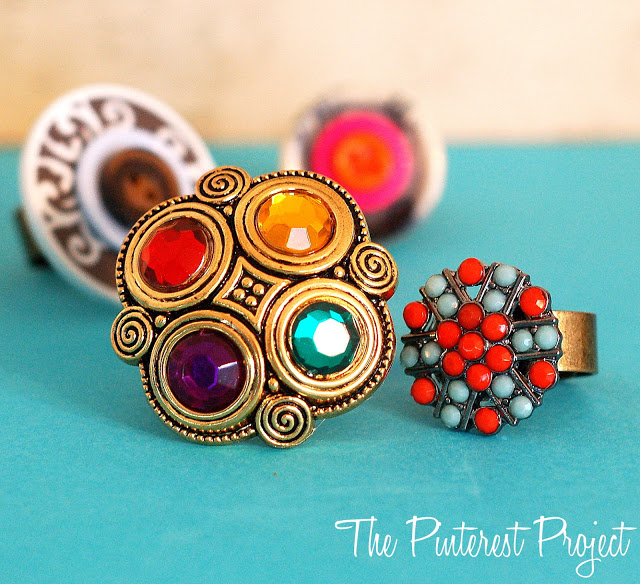
Then you'll just glue the buttons onto the rings and let dry!  Yep, that's it.  And you can make as little or as many as you want because THEY ARE SO CHEAP!  


If you already have the buttons and glue like I did, you're looking at 8 rings for $3.19.  AMAZING.


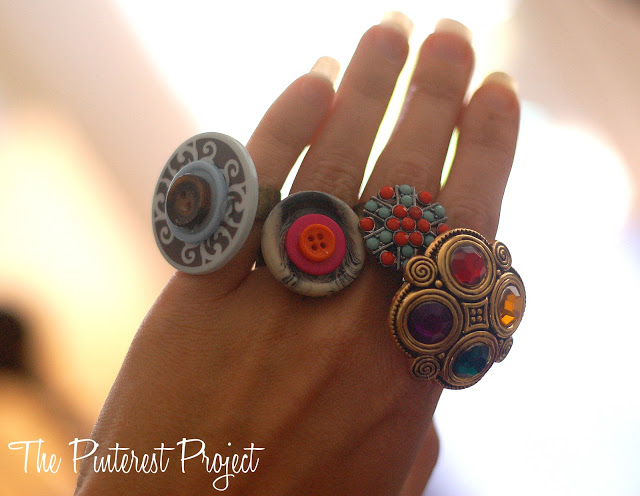
This way, you can join the big gaudy statement ring trend without breaking the bank - and you can change up your jewelry whenever you feel like it!  I LOVE doing stuff like that!


So what is your favorite item of jewelry?  Is there something you never leave the house without?


Exciting GIVEAWAY!!

Hey Friends! Can I just tell you how excited we are about this? We are hosting a GREAT giveaway today with Alissa from Rags to Stitches (she's also guest posting today) and some other awesome bloggers. Let me tell you a secret - I wish I could win this one.  I really really would love it. I am jealous of you. You need to enter and win for me. Let me live through you!! What? You want to know what the EXCITING giveaway is?? Read on ---


Today we are so excited to be teaming up with
and
and some amazing bloggers to host a giveaway you don't want to miss!
If you haven't visited Cost Plus World Market, here are just a couple reasons to pop into a store near you and do a little retail therapy.
World Market carries everything from home decor to in home and outdoor furniture to varieties of local and international foods and wines. They truly have something for everyone and their eye for color and design can and will brighten up any home.
Right now when you shop at World Market and spend $20, you will receive a 15% off voucher to purchase a ticket to fly anywhere Southwest Airlines flies. Not only that, but you can enter to win a trip for 4 anywhere Southwest Airlines flies, including hotel accommodations and a $500 gift card to do a little shopping.
That's a pretty awesome in store promotion and sweepstakes they're running, right?
Well, Cost Plus World Market wants to spoil our awesome reader's a little more:
Let me tell you about our prizes
GRAND PRIZE:
We're giving ONE awesome reader two Southwest Airlines tickets to go anywhere Southwest flies and a $100 World Market gift card!!
RUNNER UP PRIZES:
That's not all, we're also giving away away 3 $100 World Market Gift Cards
Here's how you can Enter:
a Rafflecopter giveaway
Terms & Conditions on tickets: The winner will receive two (2) tickets redeemable for round-trip airfare for two (2) people on Southwest Airlines to any destination serviced by Southwest Airlines. The tickets are valid until December 31, 2013.

Meet Alissa from Rags to Stitches

We have a fun little treat for you today.  The totally cute, totally sweet Alissa from Rags to Stitches is here guest posting and sharing some awesome tips and information about Twitter with us.  Jamie introduced me to Alissa's blog and I quickly fell in love with her openness, her honesty, her writing style and - quite frankly - her adorable clutches.  No, seriously - I already own one and I get compliments on it wherever I go.  So read on, get to know Alissa (she's one smart and savvy chick), check out her blog AND her shop.  It's the fun thing to do!

And Alissa, thank you SO much for sharing your knowledge with us today!  


Hi friends of the awesome ladies over here at The Pinterest Project.


I'm a wife and mom of two littles
I'm a blogger, handmade shop owner and recently started my own media branding agency, Pollinate Media Group.
Today I'm chatting with you about my 5 Knows for Twitter.
As many of you know Twitter is such a great space for meeting and connecting with people and so I thought I would share some of my thoughts on ways to benefit from using this awesome social media space.

1. Know Where to Start

For me, I think it's important to start at the very beginning, which in this case is your user profile. This is people's first impression of who you are.
So be aware of this when:
- You're deciding what avatar (or picture) to use. People, use something that's representative of yourself, your blog and/or your business. Personally I love to use a real picture of myself so that if I meet people in real life it's easier for them to recognize me and I feel that it's more personal when connecting with people.
- What to include in your profile settings. Twitter gives you 14o characters to be witty, charming and put your best food forward. Use that opportunity to let people know in as few words as possible, what you are all about. Are you a wife, mom, blogger, shop owner, love nail polish, enjoy laughing and long walks on a beach? I also have a URL link to my About page on my blog, so people can get to know me a little better through that avenue as well.

2. Know How to Make Friends

Now you've joined Twitter and have created this awesome profile to put your best foot forward, it's time to make friends.
Many people find themselves overwhelmed with the daunting task of making friends. It's hard to know where to begin, who to follow, how to start chatting and making friends on Twitter.
I would say begin by following people whose blogs you read and love first. After all if you feel a genuine connection to them based on reading their blog, you might find it easier to build a friendship with them online. Once you've followed your favorite bloggers, start "butting in" to conversations when you see a post or conversation that you feel you can add to. I know it will feel strange at first, but really the best way to get to know others is to jump in with both feet and give them the chance to get to know you as well. I can't even begin to tell you how many of my good friends on Twitter began by one or the other of us "butting in."
Remember to Be Real! Be the same person you are online that you are around your friends and neighbors. That, in my opinion is what helps to build real, long lasting genuine friendships on Twitter. You never know, that person could one day be your roomie at a conference, or travel 1/2 way across the US to stay with you. True stories, people, I'm speaking from experience.

3. Know When to Butt Out

So now you're all set up, meeting some great people, building those awesome connections. Things are going great!!
Now you need to know which conversations you don't need to be apart of.
I'm only going to touch on this one quickly, but it needs to be said.
Anytime there's a lot of people congregating in one place, there's going to be some drama. There I said it, it's out in the open. That does not mean you need to be part of it. I really believe that Twitter should be used to promote good and while it's sometimes hard, in the long run you'll be glad you decided to stay drama free.
Be positive. Don't gossip and try to treat others in the same manner in which you want to be treated.
If you get involved in a conversation you don't want to be part of, don't be afraid to say, "Hey, can y'all drop me off this chat?" If anything it'll make the others joining in the conversation maybe rethink how they are acting and what they are saying. Icky conversations can happen, but thankfully, they don't happen often.

4. Know How to Promote

One of the questions I'm often asked is how to promote your shop or blog posts on Twitter without overwhelming people and making them unfollow you.
Well that's a really good question and it all comes back to finding balance.
If you're spending more of your time talking about yourself (your shop, your new blog post, your blah blah blah) people are going to grow weary of seeing your posts and be tempted to unfollow you. I try really hard to limit self promoted posts where I'm promoting what's going on in my shop or on my blog to 4-5 times a day. I figure out what times during the day the most amount of people I connect with are online and I post a link to that days blog post. Then I try to spend some time interacting with my friends, finding out how they are doing and what they've been up to. Then it doesn't seem to them as though I jumped online to do a quick self promotion and then went along with my day.
Please understand that I'm NOT saying it's bad to post about your shop or blog on Twitter. In fact, it's quite the opposite. I really believe Twitter is one of the best places to get the word out about what you're doing, especially when people get excited and they tweet you in response or even re-tweet your post for their friends to see as well. All I'm saying is make sure that you're not forgetting to interact with your friends a little during the day too and find out what's happening in their lives.

5. Know About Helpful Twitter Apps

Ok friends, so now you're all set up on Twitter. You've dialed in your profile, started building a network, maybe even made some wonderful friends that hopefully you'll be friends with for many years to come, you're learning balancing the art of connecting and promoting, now here are some helpful resources for you.
Twitter has some great apps out there that can help you keep track of conversations, schedule tweets, utilize twitter from your phone, iPad and even your computer. You can even find widgets to help you send your blog posts directly to twitter for you once they go live.
One of the Twitter apps that I like to use is HootSuite. Hootsuite allows you to manage multiple social profiles (i.e. Twitter, Facebook, multiple Twitter handles, etc), schedule your messages and tweets and it allows you to analyze your social media traffic. I use this app to schedule out tweets for new blog posts, especially when I'm running a giveaway on my blog. When you're doing a giveaway to promote a brand and/or sponsor, it's important that you do your best to get the word out about the giveaway throughout the day. Scheduling your tweets helps you with that promotion.
Another popular Twitter app I see used often is TweetDeck. TweetDeck allows you to arrange all your feeds so you can follow the ones that really matter to you. This app worked really great when I attended SNAP! The Conference back in April because it allowed me to stay up to date with what everyone who attended was saying. It also helped me take a few notes from sessions I wasn't able to attend. This app also allows you to schedule tweets, monitor unlimited accounts and receive notification alerts anytime someone tweets you or about you throughout the day.
Now I know there are many other useful Twitter apps out there that you can use, but I feel like when you start listing them all out and playing the comparison game, it only becomes more confusing for you, the user, to figure out which one works best. My best advice for you is to try out a couple different apps, see which one works best for your needs and go with it. If it ain't broke, don't fix it as they say. Just because a new app comes out doesn't mean you need to know how to use it.
I hope you were able to find some of these tips helpful. You can also check out my 5 knows for Advertising on Blogs and 5 Know for Having a Handmade Business.
Thanks again for letting me pop by today!

When the Lights Go Out ...

...the blog doesn't get finished. Sorry friends. Last night we had a freak storm and our power went out. I had just taken dinner out of the oven (thankfully) but that was about all I had finished. My laptop wasn't charged, my post wasn't finished, the laundry was in a giant pile on the floor, my daughter was mad that the TV wouldn't work (mom fail) and well... that's it. Please forgive me for my scattered disaster of a day and fail in the blog world. I hope y'all have a super fun weekend planned. We would love to hear what projects you have planned!!!

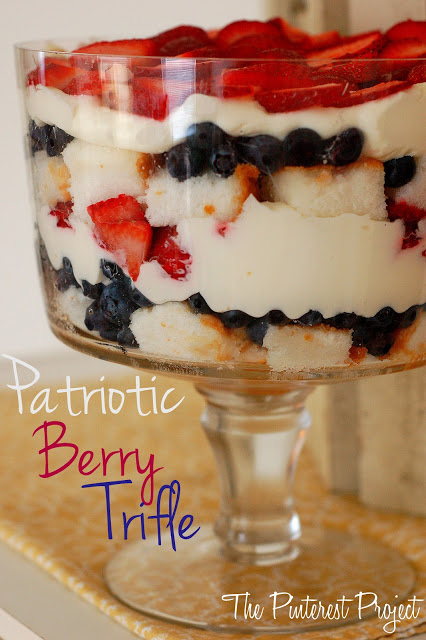
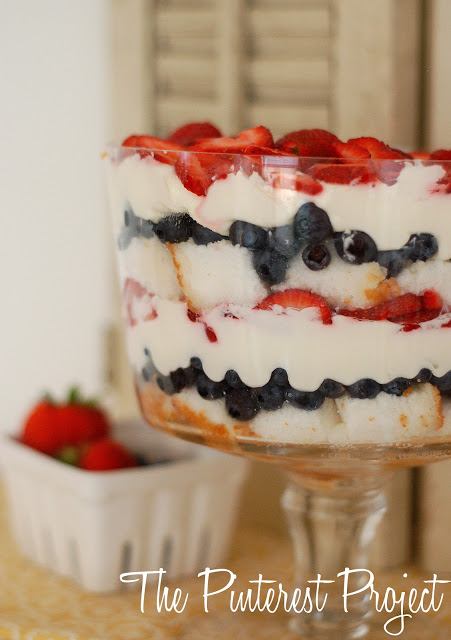
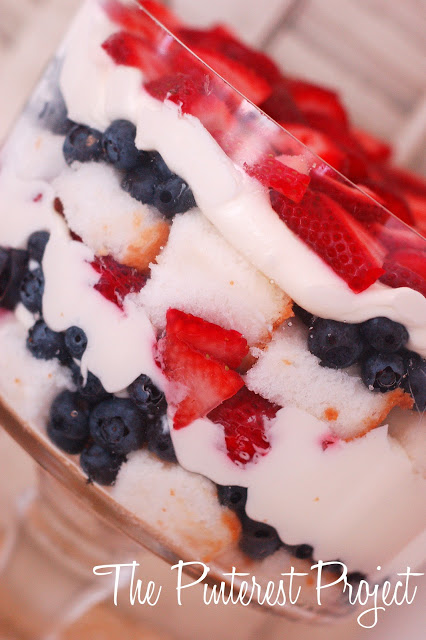
Patriotic Berry Trifle

Happy (day after) Independence Day! Hopefully everyone had a safe and happy 4th - we spent some time with some good friends and had a yummy spread of food, let the babies run around and even watched a small little fireworks display!
The 4th of July is one of my favorite holidays - it combines yummy summer food with my favorite season - summer - and everyone gets to lounge around with friends and family and just relax - not to mention I always enjoy fireworks (well, until it's time to put the kids to bed and they go on and on and on through the night...)

 I hope you don't mind yet another recipe, and a day late holiday themed dish.  Even though the colors in this dessert are patriotic, the flavors are great for summer so you can make this for any cookout or gathering you might be heading to!  It's easy but looks like you spent a lot of time on it and you will trick people into think you are all kinds of fancy with this trifle.

I bought a trifle dish recently on major clearance and it's just been sitting there, staring at me, taunting me with it's emptiness.  I was so excited when our 4th of July hostess challenged us with a red, white & blue theme for our desserts and side dishes and knew it was time to bust out the new trifle dish and put it to work.

This recipe comes from Food Network:


So, throw the kids in the car, head to the grocery store and stock up on everything you need for this delicious summery dessert!


Patriotic Berry Trifle

Ingredients
1/4 cup plus 2/3 cup sugar
1/4 cup fresh lemon juice
1/4 teaspoon almond extract
1 premade angel food cake, cut into 1-inch slices
1 pound cream cheese, at room temperature
2 cups heavy cream, at room temperature
2 pints blueberries
2 pints strawberries, hulled and sliced
Directions


Heat 1/4 cup sugar, the lemon juice and 1/4 cup water in a saucepan over medium-high heat, stirring, until the sugar dissolves. Remove from the heat and stir in the almond extract.

Brush both sides of each slice of cake with the syrup. Cut the slices into 1-inch cubes.

Beat the remaining 2/3 cup sugar and the cream cheese with a mixer on medium speed until smooth and light. Add the cream and beat on medium-high speed until smooth and the consistency of whipped cream.

Arrange half of the cake cubes in the bottom of a 13-cup trifle dish. Sprinkle evenly with a layer of blueberries. Dollop half of the cream mixture over the blueberries and gently spread. Top with a layer of strawberries. Layer the remaining cake cubes on top of the strawberries, then sprinkle with more blueberries and top with the remaining cream mixture. Finish with the remaining strawberries and blueberries, arranging them in a decorative pattern. Cover and refrigerate 1 hour.


What are your favorite summer fruits and desserts?


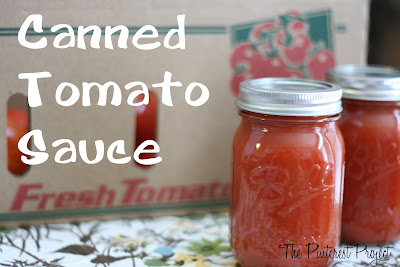
Canned Tomato Sauce

Happy Fourth of July!!! I hope you are doing something super fun that involves grilling out and fireworks. We are going to be hanging out with some friends and since we live in the fine state of South Carolina (one traffic light from the fine state of North Carolina) where there's a fireworks store on EVERY corner, we will be watching fireworks pretty much everywhere... all night long! 
 

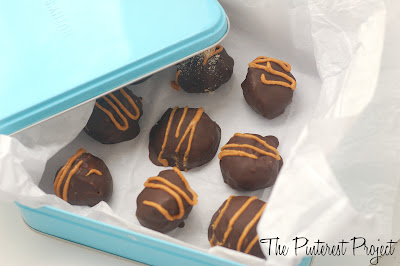
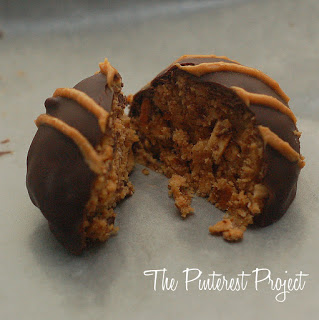
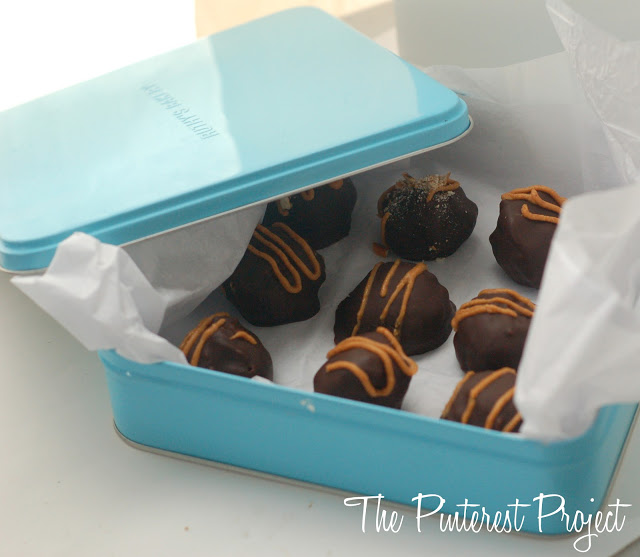
Peanut Butter Pretzel Truffles

I am a born and raised Vermont girl - relocated to the South about 8 years ago, and while I love the South and the weather, there are things about the northeast that I really miss.  Luckily, one of my favorite Vermont things - Ben and Jerry's ice cream - can be found virtually anywhere so I can have a little reminder of home any time I want to run to the grocery store.

My absolute favorite Ben & Jerry's flavor is Chubby Hubby.  Peanut butter filled pretzels, covered in fudge, mixed into a vanilla ice cream with fudge and peanut butter ripples.  Sweet, salty, crunchy, creamy - it has everything a good dessert should have.

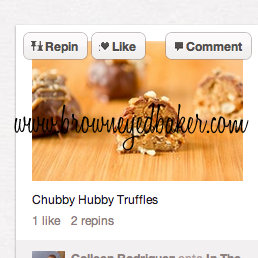
So imagine my excitement when I found a recipe on Pinterest for Chubby Hubby truffles from Brown Eyed Baker.


I already had what I needed on hand, and you probably do to - so let's get to truffle making, shall we?


Peanut Butter-Pretzel Truffles (a.k.a. Chubby Hubby Truffles)
Yield: About 18 truffles
Prep Time: 20 minutes | Chill Time: 1 hour, total
1½ cups pretzel pieces
½ cup creamy peanut butter
1 tablespoon unsalted butter, at room temperature
2 tablespoons light brown sugar
Pinch of salt
3 tablespoons powdered sugar
1 cup milk or semisweet chocolate chips
1 tablespoon vegetable shortening
1. Put the pretzel pieces into a resealable plastic bag and crush into very small bits (a rolling pin works great for this).
2. In a small bowl, combine the peanut butter, butter, brown sugar and salt. Stir until all of the ingredients are completely blended and smooth. Add the pretzel bits to the peanut butter mixture and mix thoroughly. Add the powdered sugar and mix until completely combined.
3. Line a small baking sheet with wax paper. Using a small cookie scoop, or about 2 teaspoons worth of peanut butter mixture, gently shape into a ball with your fingertips. Place the ball on the wax paper-lined cookie sheet and repeat with the remaining peanut butter mixture. Place the baking sheet into the refrigerator and chill for at least 30 minutes.
4. When ready to dip the truffles, microwave the chocolate chips and vegetable shortening together in a small bowl at 50% power in 30-second increments, stirring after each, until completely melted and smooth.
5. Working one at a time, dip one peanut butter-pretzel ball into the melted chocolate and use a fork to roll it around, ensuring that it is completely coated with chocolate. Let any extra chocolate drip off and place back on the wax paper-lined sheet. Repeat with all of the peanut butter-pretzel balls.
6. Return the baking sheet to the refrigerator and again chill for at least 30 minutes. Garnish with a drizzle of melted peanut butter and crushed pretzels, if desired. Store in an airtight container in the refrigerator.
(Recipe from Brown Eyed Baker)


What's your favorite Ben & Jerry's flavor?


Hit or Miss Monday & the giveaway winner!

Well, I am sad to say we are back from the beach.  It was a great vacation and we arrived home in Charlotte just in time for record breaking temperatures like much of the rest of the country.  So if you're in one of those areas - or even if you're not - kick back, relax, grab a cup of iced coffee and check out this week's Hit or Miss Monday.

But before we dive into that - we need to announce the winner of our Embracing Life Love Art giveaway:


Congratulations Kelly!  Please email us at [email protected] with your contact information!
Ok now on to the show...

Jamie's Hit:

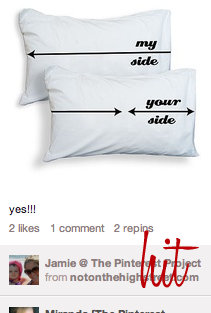
you have no idea how much i love these pillow cases. i am about to tell you something pretty embarrassing about my life. my husband and i fight over space in a king size bed. he said that space is proportional to size of the person. this worked fine for him until i got pregnant and became a whale.... then not as much. the "fights" got to the point that he put a piece of tape on the center of our headboad. yes. tape. we are that weird. go ahead and point and laugh. it made me laugh so hard the night he did it that i left it there. so now you know ---- i LOVE these pillowcases.


And her Miss:

people, we all know that louis vuitton doesn't sell trash cans. who are you trying to impress? and -- i thought people got all mad when their trash cans got stolen, why would you want to make it look like the most expensive trash can on the block??? you are asking for it to get jacked (or for me to make fun of you) 


And my Hit:

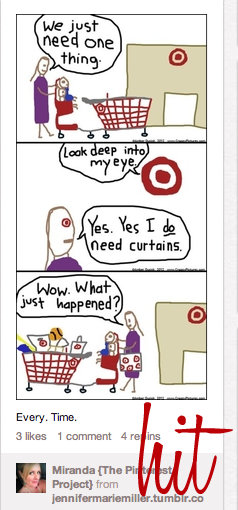
I know I am not the only one who experiences the hypnotic powers of Target.  I am starting to think they blow something through the air conditioning vents - some kind of invisible hypnotizing powder that FORCES you to wander aisle by aisle, just tossing things in your cart because you cannot live without it.  I used to think a one stop shop like Target was amazing - now I just think it's amazingly dangerous.


And my Miss:

Not only are these shoes just repulsive to look at, I can't help but wonder how contorted the foot inside of this shoe looks...what is this?  What is the point?  And HOW do you actually walk or stand in these shoes without killing yourself?  I, for one, adore red shoes and have several pair in my shoe collection - but there has to be a limit.  Even the pretty red color cannot save these shoes from being downright creepy.


So what did everyone else see this week?