Ending the Month Right: Giveaway!!

I can't believe I am about to say these words... today is MOVING DAY!! Yup. Allen is home and he brought some friends all the way from Charlotte to help us load up (we love our friends) and my sister and brother in law are on their way to help us (we love our family) and Macie - well, she's in the middle of everything... of course. 


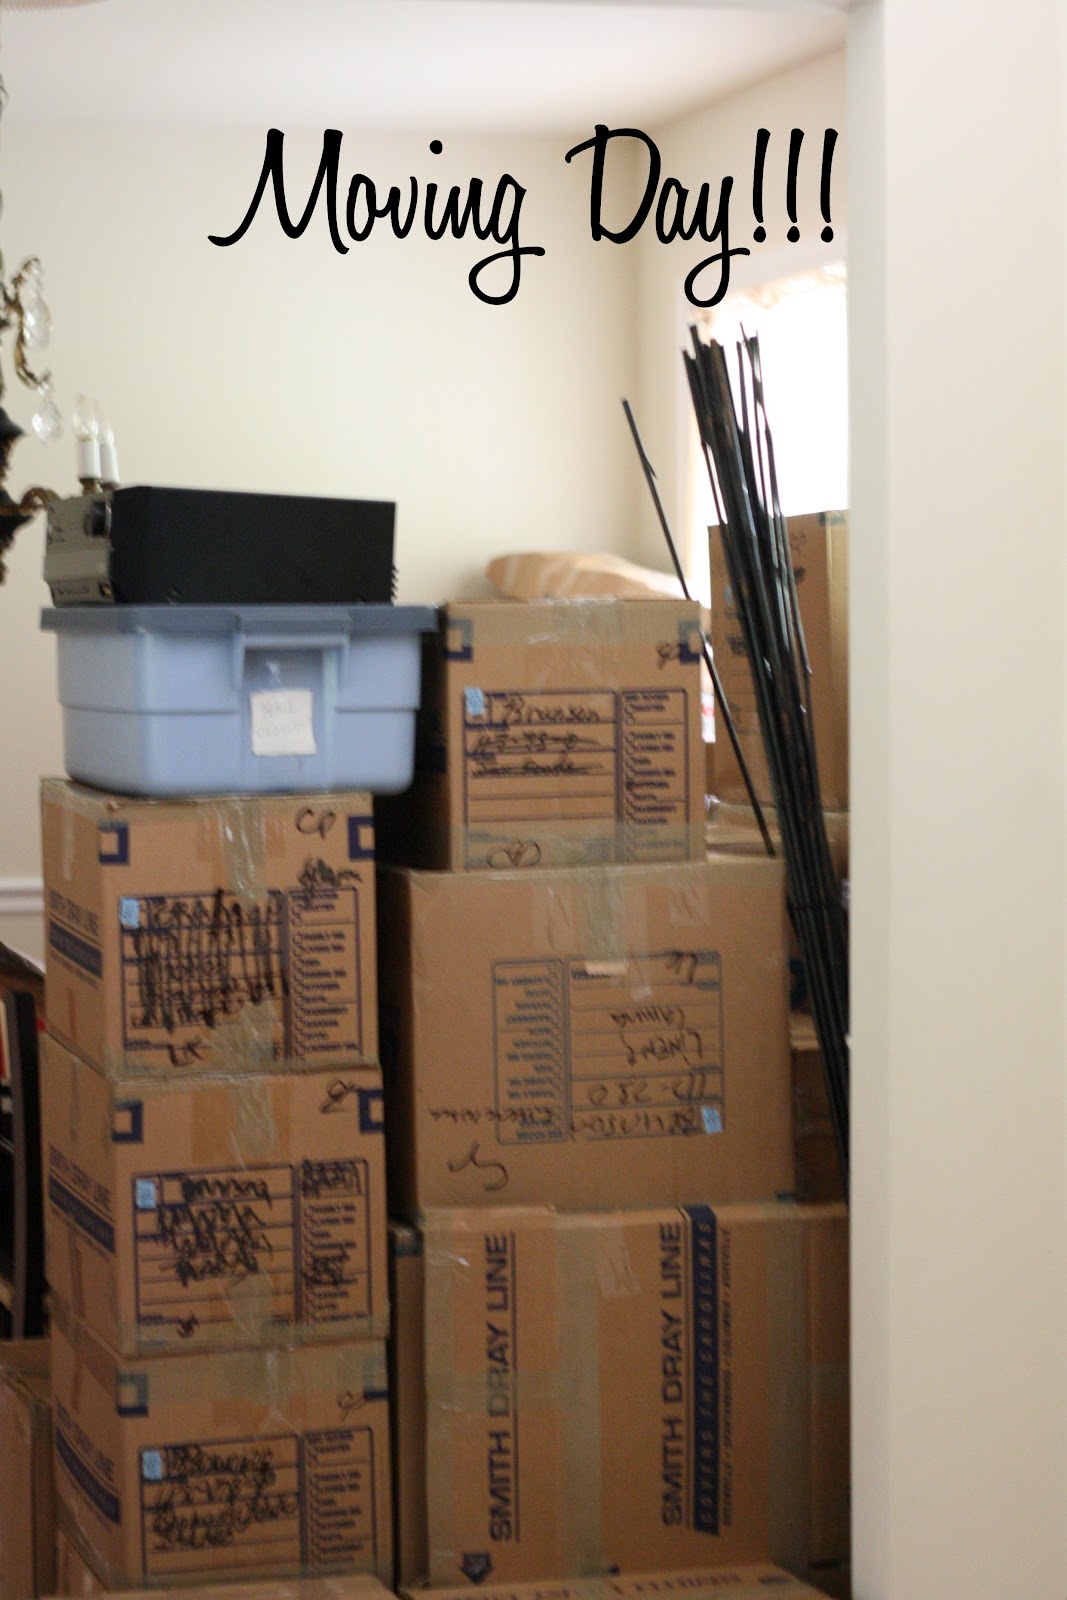
Now that today is here, it's odd to think that soon this house will be a memory and we will be back in Charlotte. I have so much to say about the journey our little fam has been on for the last two years to get to this day, but since the cable guy is on his way to disconnect our internet and cable, I'll save it for another day and introduce you to one of my oldest friends, Alicia. I love her to death and today she is doing a super fun giveaway for us. 


Hi everyone! I'm Alicia. In my pre-marriage, pre-mortgage, pre-mommy days I enjoyed traveling, discovering new places, and having an adventure or two with Jamie. Nowadays, I spend my time hanging out with my three kids (ages 5, 3 and 5 months) which is an adventure in itself. 


I got involved with Miche about a year ago because I was looking for something that would allow me to make a little bit of money and (more importantly) allow me to get out of the house and talk about something other than Disney Princesses and Thomas the Train. I looked into several home party companies. 


Cookware was out because I don't do a ton of fancy cooking. (My kids and my husband prefer your basic kid friendly food  - shake and bake pork chops and taco night are pretty much a weekly event in our house. Once I got creative and made a delicious curry chicken with apples and stuffing. It did not go over well.) I didn't want to sell makeup or jewelry because I can encourage someone to buy something that I wouldn't buy myself. Then I stumbled upon Miche and I loved it. The product is awesome, I love meeting new ladies and participating in adult conversation and it allows me to support my bag habit. 


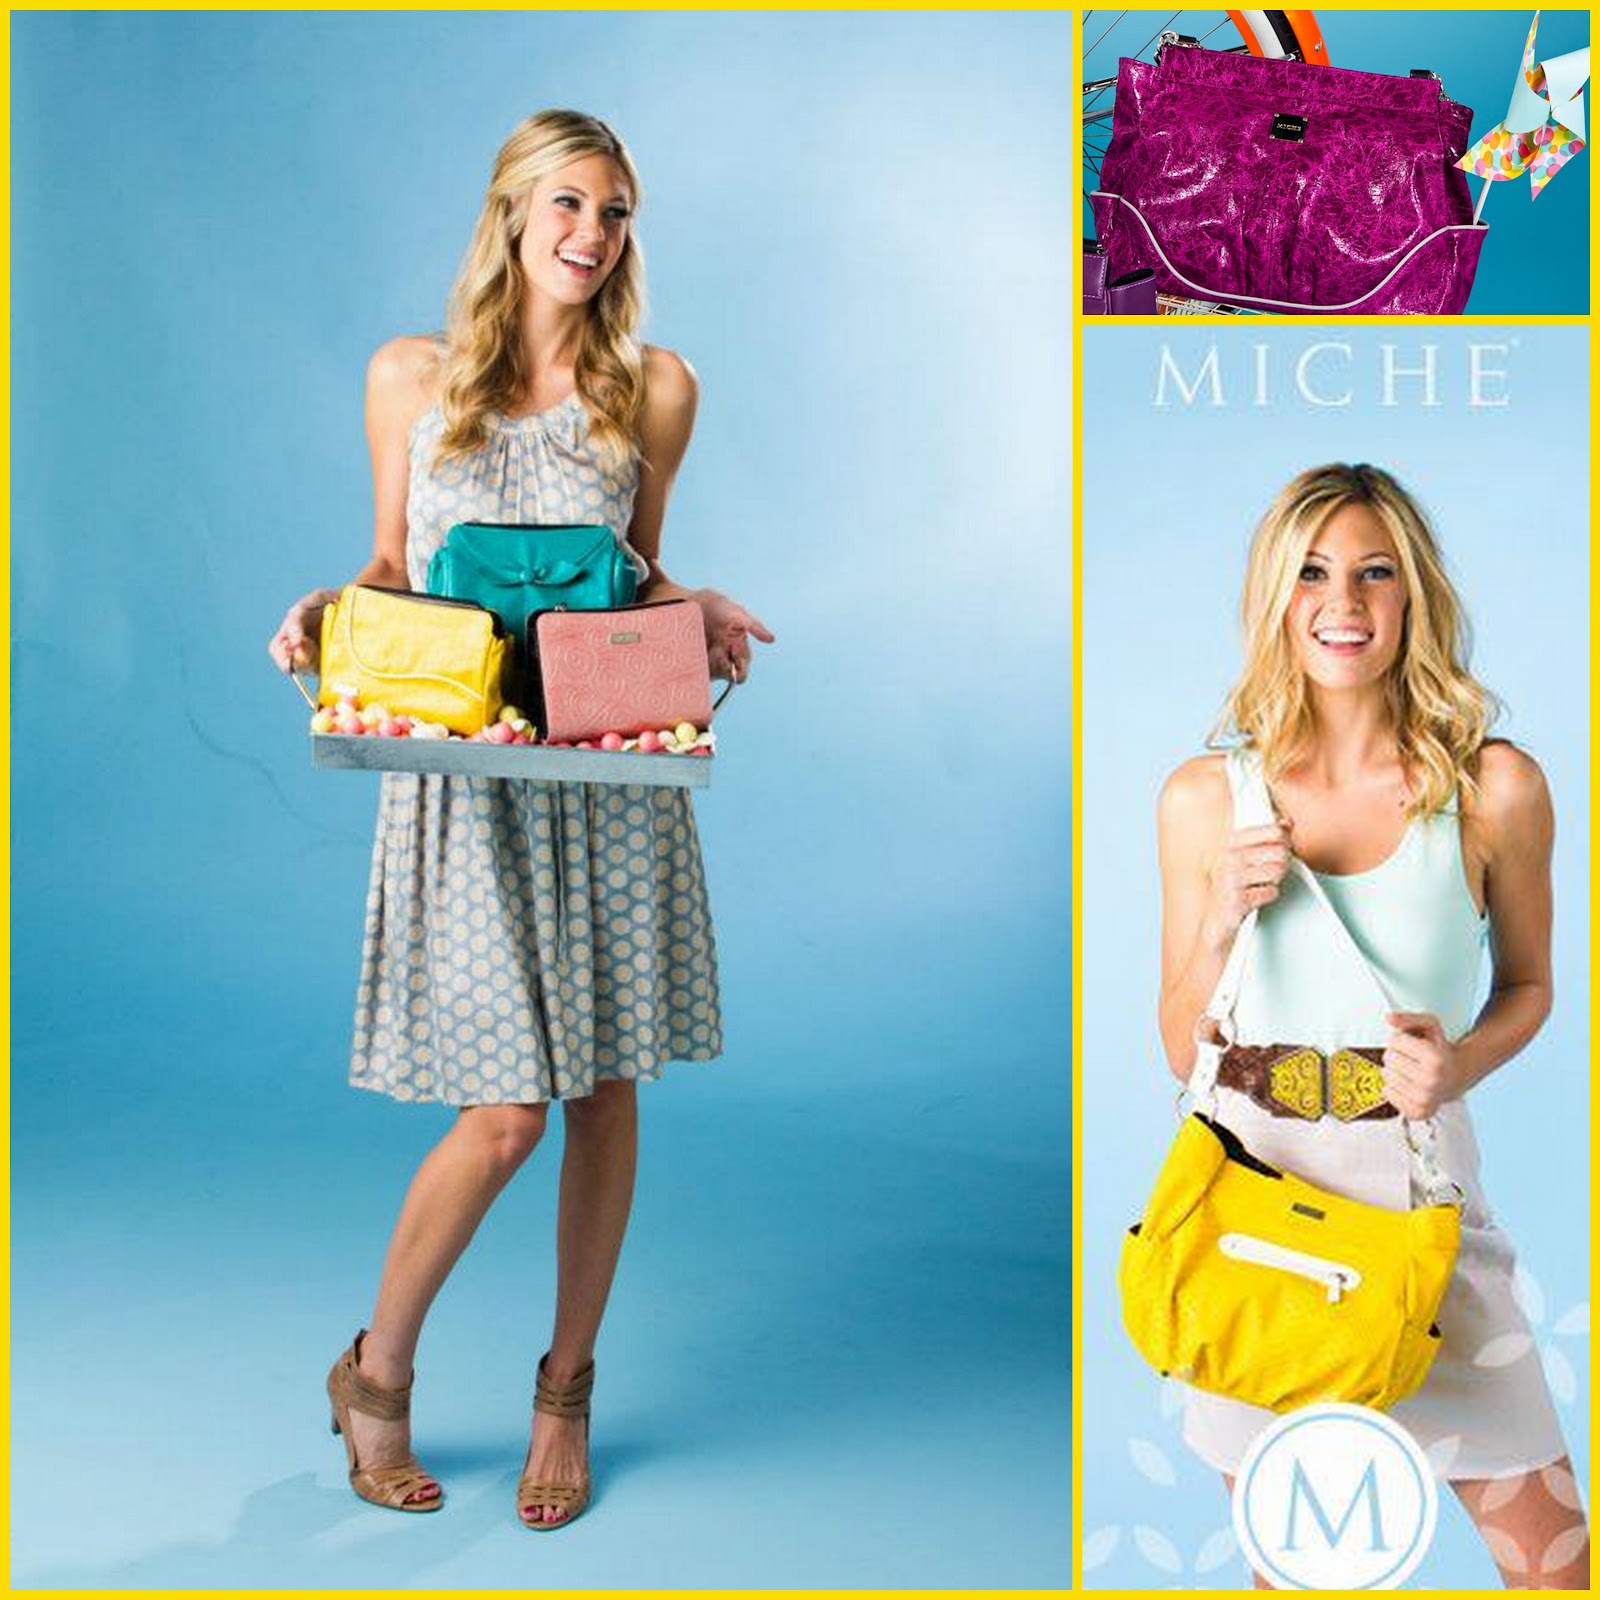
What is Miche? A Miche Bag is not just a handbag—it's a unique accessories concept that just might be the best thing to happen to women since waterproof mascara! Why? Because you can give the same bag dozens of different fashionable looks just by changing its exterior—no need to move all your belongings from one purse to another when you want a different look. All you need to get started is a Miche Base Bag (we have four convenient sizes to choose from)—then just add an exterior Shell designed for the size you’ve selected and you’re ready to go! The more you add to your collection of Miche Shells, the more options for chic looks you’ll have each and every day . . .

It's a concept that's transforming the way women look at their handbags. And with new styles released each month and plenty of handle and other accessory options to choose from, we really mean it when we say: Endless Possibilities. 

You want to try one now, don't you? Lucky for you Alicia is giving away a FREE base bag, any size you want! 

Good luck friends!! My next post will be from North Carolina!!


Hey guys!  Miranda here :)  Rafflecopter seems to be having a few issues  - so if you can't see the ways to enter through Rafflecoptere here they are:

- Leave a blog post comment - visit www.BestBagEver.com and tell us which shell you like best!
- Like this page on Facebook: 
https://www.facebook.com/BestBagEver
- Like us on Facebook: https://www.facebook.com/thepinterestproject
- Follow us on Twitter: https://twitter.com/#!/Pinterest_Proj


If you do any of the above, just leave us a comment to let us know.  Thanks!

Grandma, Grape Nuts & Granola...

When I was a child, my family vacationed once a year - to the thriving metropolis of Guilford, Maine.  Guilford is where my grandparents lived, as well as all pretty much all of our extended family.  It was one of the few times a year we got to stop at McDonalds because we were in the car so long.  Even though it took us so long to drive there, I have some great memories of those car trips.

Once we got to my grandparents house, there were a few special treats that we could always count on being there in the kitchen for us.  My grandma always had sugared donut holes, chicken pot pie, homemade pickles and Grape Nut Ice Cream.

I know, you are like Grape Nut what??  And yes, I am indeed talking about the grape nut cereal.  In an ice cream.  It sounds gross - I totally think so too - but it's this surprisingly delicious vanilla ice cream, full of grape nuts that have become soft and almost chewy.

We ate that stuff up like it was going out of style.  I am happy to report that I just googled it, and Giffords (the ice cream company who made it) STILL produces it!  Now I need to see if I can get some shipped to my house to prove to my husband how amazing this weird flavor combination is.

Anyway, since the actual Grape Nuts feel like they could flat out break your teeth, we don't eat it as a cereal around here.  Our recent go to cereal choice has been granola.  I am always hesitant to purchase store bought granola since it is full of fat and sugar and usually not nearly as healthy as they say it is.  That's why I love trying out new granola recipes - I get to control exactly what goes in it and I can adjust the ingredients to fit our family's tastes.  It's a win win.  And, granola is SO easy to make - why not make up a batch (or double it if you eat it up as fast as we do!) and have it around for cereal, snacking, ice cream or yogurt toppings...the possibilities are endless.

This is a recipe I found for a "clean" eating version of granola - and I promise this recipe has no weird ingredients.  I found it on Clean & Delicious.


I took out some of the seeds, added some steel cut oats, replaced the oil with applesauce and the agave with honey.  And I doubled the batch because we LOVE it!  If you're ready to make some of your own, check out the recipe below.


Clean Eating Almond & Raisin Granola
Printable Recipe


  • 1 1/2 cups of rolled oats
  • 1/2 c. steel cut oats
  • 2 tbsp sunflower seeds
  • 2 tbsp ground flax seeds
  • 2 tbsp sesame seeds
  • ½ cup sliced raw almonds
  • 1 tsp ground cinnamon
  • ¼ tsp allspice
  • 1/4 c. applesauce
  • 1 tbsp vanilla extract
  • ¼ cup maple syrup
  • 2 tbsp honey
  • ¼ tsp kosher salt
  • 1/3 cup chopped dried fruit (I used raisins)

Directions

Pre-heat oven to 300
Combine oats through allspice in a large bowl.
In a separate small bowl combine applesauce through kosher salt and mix well.
Pour the wet ingredients over the dry and combine until all the dry ingredients are coated with the wet mixture.
Spread out evenly on a rimmed baking sheet and bake for 20 minutes.  Remove from the oven and stir.  Pop baking sheet back into the oven for another 15-20 minutes or until the granola is lightly golden.  Add chopped, dried fruit after removing granola from the oven to prevent it from becoming over cooked and chewy.
Remove from oven and cool completely before storing in an airtight container.  Enjoy!
Makes 4 cups (8 -> 1/2cup servings)


So...is there ANYONE out there who has eaten Grape Nut Ice Cream, or am I one of the only ones?


~miranda


Bread for Packing

Here is my advise of the day: Don't move. Wait, that doesn't sound right. You can move around, just don't move houses... ever. Okay, that may be a tad extreme so how about this? If you have to move then just pack everything in your closet and drawers without asking questions or deciding that it is the perfect time to sort. You ask why I am giving this advise??? Because I'm a moron and didn't follow it myself. There is nothing like sorting through all the various sizes and styles in your closet to give a girl a big ol' pick-me-up in her day. I'm lying. It's horrible. If I were not in a packing frenzy right now and I were way way braver of a person I would take you on a photo fashion show of some of the gems I have found tucked away in my closet. Scary stuff friends, scary stuff. After doing about three or four turns of horror in the closet I decided it was time for a break. I couldn't take it anymore and I came out of the closet.... and made some bread. Yup. Nothing like drowning your fashion sorrows with some carb loading. MMMMM... bread.

I have tried my hand at the no knead bread craze before and had pretty good results so when I stumbled on this pin from Simply So Good with a variation on the recipe and a ton of tips on different bread varieties, I jumped at it. Well, that and I have some ingredients that need to get out of my pantry this week... details details. 

The basic recipe only uses white flour, but I really wanted some wheat bread so I decided to make a few changes so I could get some delicious wheat bread. This bread is so easy to make, its not like that old school bread your mom made that took all day and you had to knead it forever and ever. It also doesn't have an annoying hole in it the way bread maker bread does (do people still use bread makers?) Keep in mind friends, I'm in the middle of a move and I could make this bread - SO Easy. Basically, you mix all the ingredients in a bowl and let it rise for like 12-16 hours. Heat up the oven, throw the dough in your dutch oven and bake it. That's it. I will give you this one word of warning. If you have happen to have a table in your kitchen that you mod podged years ago (what? that's only me?), don't sit your hot dutch oven onto it so you can take a picture of your fancy bread. 


You may not be so pleased with the results when you lift the hot dutch oven off the aforementioned mod podged table. Just sayin'.

Let me just show you this yummy carb goodness.


You know you want some. It was so good. I say was because Macie and I chowed through this bread. We had it with cheese, with apple butter, with chutney. Yup, we ate a ton of bread. Simply So Good has a ton of variations that I want to try. I think the top of my list is jalapeno cheddar and rosemary lemon gruyere. Isn't you mouth watering a little bit? Time to bake some bread. Get on it!!

No Knead Crusty Bread - printable version
adapted from Simply So Good

2 cups unbleached all purpose flour
1 cup whole wheat flour
1 3/4 teaspoons salt
1/2 teaspoon yeast
1 1/2 cups water

In a large mixing bowl, whisk together flour, salt and yeast.  Add water and mix until a shaggy mixture forms.  Cover bowl with plastic wrap and set aside for 12 - 18 hours (I did 16 hours).  Overnight works great.  Heat oven to 450 degrees.  When the oven has reached 450 degrees place a cast iron pot with a lid in the oven and heat the pot for 30 minutes.  Meanwhile, pour dough onto a heavily floured surface and shape into a ball.  Cover with plastic wrap and let set while the pot is heating.  Remove hot pot from the oven and drop in the dough.  Cover and return to oven for 30 minutes.  After 30 minutes remove the lid and bake an additional 15 minutes.  Remove bread from oven and place on a cooling rack to cool (if you can wait that long!


Hoodiesaurus


So the other night after I put the baby down for bed, I was getting ready to take a shower when I noticed this in my bathroom garbage can...


In case you can't exactly tell what those are - they are socks.  Mostly baby socks.  Since I'm lazy, and was already about to jump in the shower, I sent a text to my husband who was downstairs.


I didn't get the answer to my text until AFTER I was out of the shower, that's how long it took him to think of such a crafty response.  Let me stop here and say that my husband does 95% of the laundry in the house.  He hates when a laundry basket has ANY dirty clothing in it, so it's become his job.  Because I hate doing laundry and am perfectly happy with him doing this chore, I rarely complain about anything laundry related.  And yes, I realize I am very lucky that he takes care of what is basically the worst household chore.

However, THIS was ridiculous y'all.  First of all, baby socks are like, their own species.  They seem to multiply when I'm not looking and I swear they change colors behind my back JUST SO I can't find a matching pair when I'm trying to get out the door quickly.  Secondly, my husband is COLOR BLIND.  (Yes, I realize it might not be the smartest thing I've ever done to let my color blind husband do the laundry but it's a chance I'm willing to take)

Let's recap, shall we?  My color blind husband decided none of the baby socks matched and threw them all out.  In the GARBAGE.  Seriously.  I pulled them all back out, and all but one had a match in there.  Which means - he threw out several pairs of perfectly matched baby socks.

Husbands.  

Anyway, I felt bad for my poor almost sockless little guy, so today I made up for his father's shortcomings by making this:


Are you already screeching at the cuteness?  I  know, I was too.  Found this awesome tutorial on Pinterest via Ginger & George.


I've been wanting to try this hoodie for awhile, and after finishing it, I'm kind of mad at myself for not doing it earlier.  It was much easier than I anticipated and it's so cute I am tempted to turn all his shirts into dinosaur shirts.


Supplies needed:
- Hoodie
- Felt or other stiff material
- Matching thread, straight pins, pencil or chalk for marking


Step 1: Cut out diamond shapes from the felt or other material you plan to use.  I free handed this, but Ginger & George gives you a template.  You'll have to adjust it for the size you need, so for me it was just easier to eyeball it myself.  

Step 2: Pin your diamonds down on the back center of your hoodie or shirt.  I actually drew a chalk line down the center to give myself a frame of reference.

Step 3: Sew down the center of each diamond

Step 4: Continue down the entire back of the hoodie

Step 5: Sew the triangles of the diamond together to form the "spike" I sewed mine up with a sewing machine and it went very quickly - but you could also do this by hand if you wanted a little more control.

Put hoodie on cute baby and giggle.


~miranda


And, if you get bored...check out my little dancing dinosaur:

I know I'm biased, but it doesn't get much cuter than that!

Hit or Miss Monday

I swear the last several times I have prepared the Hit or Miss Monday post, the mere sight of some of these pins have set me off laughing until I am in hysterics and my husband is giving me the stink eye from his recliner on the other side of the room.

Yes, he has a recliner.  And yes, he falls asleep in it.  And yes, he snores.  So I'm not sure who should be giving who (WHOM?) the stink eye.  Because the sound of my laughter is oddly close to the sound of angels singing from the heavens on high, his snoring is...well...not.

Anyway - let's get on with it.

Jamie's Hit:


This is amazing. I love it. As many of you know, we're moving (it's almost over, I promise and then no more moving talk) and I swear that realtors wait until I am in the middle of something or the house is a giant mess to call for a showing. I'll rush like a mad woman to get the entire house clean and the other members of the family will go around messing things up --- HELLOOOOOOO, I JUST CLEANED!!!! (sidenote - cleaning when the majority of your belongings are in boxes is a bit of a challenge. It's like cleaning a maze.)


And Jamie's Miss:

"You know, just wearing my pizza shirt. Doesn't it look good??" Ummm.... NO!!! It doesn't look good. It makes you look greasy and like you smell funny. This is the kind of shirt that makes me want to walk FURTHER away from you. It's the kind that says you haven't showered in weeks. What? Too harsh?? That was my tamed down version. This is plain nastiness in clothing people and I even like pizza. This shirt gives pizza a bad name. 


And my Hit:

This is a handy little guide for those of us who have relocated South from other places.  The first time I said "y'all" after I moved to North Carolina from Vermont was on a message I left on my parent's answering machine.  They said they laughed and laughed and saved the message for awhile to mock me in my absence.  But as much as I love my home state - I gotta admit, Y'all and All Y'all are much nicer on the ears than YOU GUYS.  


And my Miss:

This is another one of those sort of a hit and sort of a miss things.  The only reason I'm calling it a Miss is because it's very clearly mislabeled.  The description on this pin is nowhere near what the picture is.  Which kind of also makes it a Hit.  In fact, Jamie's the one who sent this to me via gchat the other night.  We were up.  Late.  And, I may have been so tired I was punch drunk.  I laughed so hard I cried.  And then I snorted.  Which, as you can imagine, also invoked the stink eye from my husband.  Which  made me laugh even harder.  I invited him to come look at what I was laughing at, but he didn't see the point in getting up to see what was so funny.  His loss.  That said, I'm sure the dress that should have been pinned here was truly beautiful.


What did ALL Y'ALL see this week?  

~miranda & jamie


Roll the Fruit... Up

Packing has struck again. I have tried to do about million things today (okay like six) and ended up missing one small part of what I needed because it's in a box. There are so many boxes. I think Macie is even tired of the boxes because she got mad at something today and tried to push one. Poor kid. What was she mad about you ask? Food. My child could eat forever. She is never ever full. At first I thought it was good that she was always willing to eat whatever I gave her, but now I am starting to wonder. She has a little temper and she wants food, watch out!! 


Because of her massive appetite, I've been on the lookout for some snacks that I can give her throughout the day. She hardly ever has sugar and I am happy to keep it that way so when this pin from Our Best Bites for fruit leather (formerly known as fruit roll-ups) came up, I jumped on it. I had seen a few before but that was before Macie started trying to eat me out of house and home so I wasn't as eager to try them. The best part of this pin, I thought I had everything I needed on hand to try it... thought is the key word in that sentence. 

A couple weeks ago I had gotten a ton of blueberries and strawberries and didn't use them all fast enough so I froze them. This was the perfect time to use them (since I'm trying to clean out the fridge and freezer) so I grabbed them and thawed them just enough to get make sure they would blend. The food processor is already packed - shocking, I know - so I used the blender instead. I threw the fruit, a little honey and some lemon juice in the blender and let it do its magic. By magic, I mean, I shook it and muttered under my breath until it got through all of the strawberries -after that it was smooth sailing. If the kitchen gods are listening, I would like a fancy ninja blender that doesn't test my religion - just saying. 


Anyway, back to the blender. Once the fruit was blended smooth, I grabbed the cookie sheet and silpat. Wait, the silpat was packed too - again, the shocked face - so I after some contemplation I decided to use the plan B from Our Best Bites and got the plastic wrap out. I covered the cookie sheet in plastic wrap and then poured the blended fruit onto the cookie sheet. After shaking it a little so that it was nice and even on the cookie sheet and popped it in the oven and waited... and waited... and waited. Yeah it takes a LONG time. After about 8 hours, it was time to take it out.  YAY! Time to cut and wrap them up and call it a day (or night since it took so long).


I have to tell you, I was a little disappointed in a few of the pieces, not in the taste... they are good - really good, but in the consistency. I think that I need to work on this a little bit more. I also think that I need my silpat. The plastic wrap wasn't smooth (user error) so there were some thicker spots in the fruit and that made the drying a little uneven. I had one area that was nice and thin and it came out great, but then another area that may have been too thick so it didn't dry out enough and was still a little wet on the under side. I'm not going to give up on this one though, it's a pin in progress. The taste is really good so I think I just need to master the fruit leather pouring technique. Have any of you tried fruit leather? How'd it go? Have any tips? Bring them on!! 


A jarring week...

It's been a big week around here people, a big week.  Today, my littlest is 11 months old (what?!) and while my oldest was taking his first steps by now, this one seems to find talking more fun than walking.  He's like his Dad in that way, I guess.  He's been saying "light" and "hi" for a little while but this week he has begun confidently saying "Mama".  (I know all you moms out there are secretly high five-ing me because he said Mama and not Dada first...my husband and I were in a competition to see who could influence him the most - I would whisper in his ear Mama...Mama...)

Not only is he speaking, he's now performing death defying stunts in his crib that include blood and bruises and well, basically terrifying me.  It's been a week of frazzled nerves, highs and lows but I guess that's the joy of parenting, right?

When he FINALLY went down for his nap, I was happy to get started on this project.  Is there anything prettier than a colored jar?


I found this pin from Gingerbread Snowflakes by way of Under the Table and Dreaming.  There was a whole list compiled of 50 ways to repurpose jars and this was one of them.


This tutorial is going to show you how you can make your own colored jar with the simplest supplies.  I'd seen tutorials for this project with special glass paints and they required 48 hours and baking the paint on, etc etc.  This one took me less time than Beckett's nap did and used supplies I already had on hand.


Make sure your jars are clean, mix a good dollop of mod podge and a few drops of food coloring together until you get the desired color.  Then you simply start painting the colored mod podge on the outside of your jar.  This is me attempting to make an "ombre" effect jar...


It's really cool to watch how the paint and colors change as the Mod Podge dries.


I think they make gorgeous vases or even candle holders!


(that's the ombre effect jar...kind of hard to see it)


Are you sick of pictures yet?  I seriously couldn't stop taking pictures of these pretty jars!  I'm thinking about changing the name of the blog to The Jar Project and just featuring lots and lots of pretty jars.  I wonder how Jamie would feel about that...


You will definitely need to seal the jars with some spray sealant to help keep the color from rubbing off.  And hopefully this goes without saying, but don't use the jars for food - especially after they have been sprayed with the sealant!  The original tutorial used the Outdoor Mod Podge so you could hang them or use them outside as lanterns which is also an adorable idea.  

Ok, last one...


So, there it is - a fun and easy tutorial with endless possibilities.  I was starting to look around my house wondering what glass item I could paint next...

~miranda


DIY Baseball Wreath

It's been a busy week here in the casa. My parents came down to help me pack ---HALLELUJAH! Sidenote - my mother could be a professional packer. It's almost scary how good she is (especially considering she hasn't moved in 30 years or so) and how much she can pack in a short period of time. If Macie had stayed still for more than 5 seconds, she could have ended up wrapped in a box.
 

While my parents were here, my dad was bemoaning how his beloved Phillies have started their season. My dad is a giant Phillies fan, I mean HUGE. He loves baseball, he even gave me a baseball, bat and glove when I was about seven.
 

Peanut Butter Cups

I'm pretty sure I have had a sweet tooth since I came out of the womb 33 years ago - I have always, ALWAYS loved sugar.  You know how some people talk about craving salty snacks?  I don't get these people.  The people who would rather sit down to a bag of potato chips than a pan of brownies...that's like another language to me.  Why go for crunchy, greasy, salty chips when you can have ooey, gooey, soft and delicious chocolate brownies?
Anyway, when I was growing up we did not have much junk food in the house.  This is part of the reason I developed a knack for baking - if I wanted something sweet, I was going to have to create it myself.  Some of my earliest memories involve making pancakes on Saturday mornings, whipping up a batch of chocolate chip cookies, or my Dad's favorite - the No Bake Cookie.  

One other thing I did a LOT was to melt chocolate chips in the microwave, add a healthy dollop of peanut butter, mix well and pour onto a piece of tin foil.  Then I'd stick that in the freezer for as long as I could stand it and have myself a homemade treat similar to a peanut butter cup.  

It should be no surprise that I love all things peanut butter and chocolate.  Heck, I even made my own peanut butter recently - yum.

Hit or Miss Monday

This week I bought myself a big ol' white board that I plan to mount on the wall and use to organize my life.  I am pretty sure the white board has some kind of crazy voodoo magic that will turn me into a highly efficient and organized machine of a person.  I swear, every Monday I wake up and think to myself, "WOW, last week was so crazy - I am really, really glad we have some down time this week"  and then I lay there and sleepily imagine breakfast in bed when reality slaps me around and I sit up in a panic realizing I forgot that I have 400 things to do. 

I'm not alone in this, right? 

Just when I'm looking forward to this:


Suddenly, this happens:


But, at least being so busy keeps me from wasting time on things like Pinterest cleaning.  ;)

Thank goodness for this week's Hit or Miss picks, because they had me giggling as I wrote this blog post. 

Jamie's up first - with her Hit:

Okay does this even need an explanation?? How much fun is this? I've already decided that the next time I see Miranda I'm making her do it. There is nothing like seeing a friend's smooshed face to make you laugh as you're answering the phone!  Miranda says: HECK YES.  Game on. 


And her Miss:

Really?? You are on an overcrowded flight and you choose to get up and go into the smelly, tiny bathroom and play with the disposable toilet seat covers?? You decide to not only play, but pose and try to reenact a famous work of art... in an airplane bathroom?? wow.


And my Hit:

It's easy to feel popular with social networking right?  Like, "Oh look at me, I have eleventy billion friends on Facebook"  (Sure, some of them are old preschool playmates, and I haven't seen a few of them since elementary school, and a handful of them are just my friends because they know my sister's mother in law's cousin Ethel and her daughter June...)  Anyway - I DO seriously think that you can tell a lot about a person through social networking, and specifically by what they pin, and I think this a LOT!


And my Miss:

Ok, admittedly I'm not a pet person.  I've tried, and it's just not for me.  It's not that I want to punch kittens or anything, I just don't do well with pet hair and pet vomit and pet poop and...well, you get it.  I'd pick a tiny human any day.  Now that you all hate me and think I'm a sad shell of a human being, let me say that I DO understand why people love having pets (because I do too, in theory!) and I TOTALLY get the whole "pets are part of our family" thing.  I even think dressing up your doggy can be cute.  But fake nails?  I'm...um...at a loss.  How would this even work?  Because I've had a dog before - and she would have chewed these suckers off as fast as they went on.


That's it for this week's Hit or Miss - what did you see?

~miranda & jamie


Drumroll Please...


I am so glad that it is Friday, friends. It has been a killer long week. Poor Macie has been running a fever and feeling lost all at the same time. She keeps waking up from naps to find more boxes and more things missing. I felt a little bad when she went to her trusty tupperware cabinet to find only three containers. She didn't seem very interested in playing in the cabinet after that. Since we've been in packing purgatory, I haven't been able to get too much else done around here. I'm pretty sure all of my crafting supplies are feeling neglected and getting dusty from lack of use. It's sad really. 

Because of the lack of crafting and a sick little lady, I've decided to go into the archives and dream about a simpler time - a time with ice cream trucks and yummy treats. Ice cream treats are just an iconic part of summer, a necessity. As a kid I would always want a drumstick because I liked the ice cream and the nuts but would ditch the bottom of the cone before I got to the chocolate - that's me though. I needed a way to be able to customize my drumstick so that it was just how I wanted it and not have to ditch any of it. Wouldn't that be nice? Yes, yes it would. Hellllllo Pinterest.


I found this great pin from Instructables and immediately thought of all the ways I could make my very own drumsticks with my very own fun combos! Yay!!!! I was planning to give you a step by step on this one, but well in true style of my week - my computer has magically deleted most of my pictures and left me with the craptastic ones. Yeah - have I mentioned its been a LONG week? Sometimes you have to know when to throw in the towel and say UNCLE!!! I think this may be my time. I'll tell you this - go over to the tutorial on Instructables and read it over and then go to the store and buy all of your supplies (and don't pick vanilla ice cream, thats just dull!) and make some drumsticks. They may take a few steps but on a hot day, or even on a cold day that has had a few bumps - they are worth the effort. Make a drumstick and let all of the chaos melt away ... but don't let the drumstick melt because that would make a mess, and that would mean one more thing to deal with and who needs another mess to deal with?? Eat a drumstick and have a fun weekend!!


Stamp an Eraser!

I love finding little ways to personalize things for people - just a small little homemade touch can go a long way.  But - like most of you - I'm pretty crazy busy a lot of the time, and I need these little homemade touches to be quick!

That's why this project appealed to me - it was quick, it was CUTE, it was crafty and it was - wait for it...cheap.  Sign me up!

I've seen these pins before - the carve a rubber stamp out of an eraser idea - couldn't quite wrap my mind around it so I never paid much attention to it.  MISTAKE!  For whatever reason I clicked through this time around and I'm really glad I did.

All you need for this project are some brand new #2 pencils with unused erasers, an xacto knife, a ball point pen and some ink pads!


I happened to have all those things on hand (ok, I did scrounge through my 5th graders room to find some #2 pencils...) so I got to work right away after reading the tutorial on Wholly Kao.


First, you draw the design that you want on your eraser with the ballpoint pen.  Obviously an eraser is kind of teeny, so you will need to choose something that will fit.  Like the original blog, I did a triangle and a heart and then I wanted to do a cute umbrella card, so I also added a rain drop.

Once you have the design drawn on, you just use your xacto knife to cut around it very carefully.


Then?  Stamp away!  Make cute cards and envelopes, gift tags, love notes to your spouse or kids...such a fun and easy way to add a little personalization to just about anything!


~miranda

Spring has Sprung ... and so has Neon

Have you noticed that as spring is well, springing - so is neon?? It's all over the place. There are some things that are just blinding. You know the blinding I'm talking about - that 80s blinding. All the clashing neons of pink and green with flashes of yellow. Confession - I used to wear not one, but two pairs of neon socks to school. I had these kicking neon green and hot pink socks with silver metallic thread running through them and I would wear them with my awesome high tops. Yup, I was SO cool. It was this flashback that made me a little bit leery of the newest neon trend. I don't want to accidentally fall into the past and end up a clashing neon mess. That would be embarrassing. I stumbled on a pin that intrigued me enough to start contemplating neon. Contemplating. 

It's no secret that I love shoes. Allen would tell you I have way too many shoes, but really - is that even possible?? Crazy talk I tell you. Back to the pin from Shrimp Salad Circus - aren't these cute shoes? I kept looking at them and after some further contemplation, I decided it was time to dive into the neon. I did use caution though. No yellow or pinks. 

It just so happened that I had a pair of Rocket Dogs (I heart Rocket Dogs) that I haven't worn since before I was pregnant. It could be because my feet swelled in my sixth month of pregnancy (August!), it could also be because they got stuck under some crap in the back of the jeep and I just found them. Oops. My scattered brain worked well for this though, I now had the perfect subject for my little pin-experiment. 


I gathered my supplies (tape, mod podge, acrylic paint and brushes) and got to work. First, I taped up the shoes so that I wouldn't get paint on anything but the toes. My shoes have a bow so I taped the bow up but if your shoes don't have a bow, just tape across the toe in a nice, neat line. Good luck with that!


After you are all taped off, paint a nice coat of acrylic paint onto the toes. Make sure you get in all the nooks and crannies of the shoes and then, let it dry. Good and dry. 

Now repeat and do a second layer. Let it dry completely. I can be super a tad impatient, so this was tough. 

Time for the last layer of paint, be careful! That's it - three layers of paint done. Time to let it dry. Completely. 

Once everything is good and dry, get out the Mod Podge. I used regular Mod Podge at first and then realized I had outdoor Mod Podge. I know, its sad that I didn't know I had it. Moving on. I did a thin layer of outdoor Mod Podge and let it dry and then it was time to pull all of the tape off. Yup. That's it!


What do you think? Am I one step away from neon socks? Please tell me no. 

Project: Parfait

This past week was spring break, and my son requested a trip to the mountains.  It was one of the craziest weeks ever, but I did make sure to set aside some time to take him to Boone, NC.  We stayed in a brand new hotel with an indoor pool and we did (and ate) whatever he wanted.

One of things he wanted to do was visit Mast General Store - one of our favorite places ever to poke around.  You can find all kinds of cool treasures here - so while he was looking at toys and candy, I found myself checking out the kitchen section.  I picked up some really cute old fashioned ice cream sundae type dishes and immediately started daydreaming of ways to use them.

We've given up dairy - but I knew they would the perfect dishes for a delicious parfait, like this one that inspired me from Jozi (un)Cooked.


The fun thing about parfaits is the options and flavor combinations are kind of endless.  I made a vegan parfait, but you can use whatever ingredients/fruits/etc that you have on hand.  I happened to have some of my favorite addiction vegan chocolate chip cookies from EarthFare, delicious strawberries and some whipped cream made from coconut milk.  I just put a layer of crumbled cookie on the bottom, added a layer of the coconut milk whipped cream, then sliced strawberries and repeat!


Every bite was DELICIOUSNESS x 47!!  Why don't I make more parfaits?  


~miranda

Happy Easter!

Hope you all enjoyed an awesome weekend!

Hit or Miss will return next week!


Rope, Rope, Bowl

I feel like I'm a broken record lately because all I talk about is packing. Sorry friends, packing and cleaning has taken over every empty space in my brain. I have lists all over the house - I have lists about errands to run, I have lists about what to pack next, I even have a list of what's in the freezer, what's in the pantry and what's in the craft bins. I may have a list to remind me of where the lists are! It seems crazy, but the lists are helping my frazzled brain --- somewhat. Since I'm trying to pack everything up and I have my handy list of craft supplies, I realized I had rope. Yup, rope - full disclosure - it's clothesline. I had bought it for something else and the something else was a fail so here sits the rope in need of a project!

Enter this little pin from Belrossa.


I've seen a million versions of the rope baskets and decided that I would give it a try since I had all of the supplies.


The basic rundown of this project is simple... grab a bowl to be able to use as a mold, hot glue the end of the rope so it doesn't fray and then start glueing the rope on itself in a spiral pattern. Once you've gotten to the same size as the bottom of the bowl, start glueing the rope to itself, wrapping it around the bowl to get the shape. Wrap until you're satisfied (or you run out of rope) and glue the end down. Once the glue is dry, remove the bowl from the bowl mold. I was a tad distracted and glued the rope to my bowl mold a couple places and couldn't get it off. After a few failed attempts and muttering to myself, I poured some boiling water into the glass bowl and it loosened the glue enough for me to get my new rope bowl off. 


Ahhhhhh - success. It feels good. Not as good as crossing things off my list, but good!!


The Cold Shoulder

<----LOOK at that shoulder.  It must be so cold there, just hanging out, sleeveless...

...ok, not really.  Temps are in the 80s here (at least for a little while) and it definitely has been feeling like summer.  The time has come to pack away the sweaters and jackets and pull out my summer wardrobe.  Except that last spring/summer I was pregnant/post baby and we all know what that means for a summer wardrobe...er, lack thereof.

This summer, I have (thank you sweet baby Jesus) shed the baby weight and then some.  I am ready to revamp the ol' closet.  Unfortunately my husband isn't ready to hand over the plastic so I am forced to be creative!

FORTUNATELY I love a good challenge, and I love Pinterest so I don't mind too much.  I stumbled across this pin from PS...I Made This and debated it for several months (yes, months.  I'm highly indecisive, don't judge me...)  I thought the shirt was cute - but wasn't sure about the one shouldered thing.  Plus, I'm secretly fighting with the PS...I Made This lady, because I have attempted two of her projects and had epic fails.  But this one seemed to be pretty easy and idiot proof.


First things first - rifle through hubby's drawers and steal a white tee shirt with FULL intention of buying a new one to replace the one you stole.  Then, you'll cut 2-3 inches off the bottom of the tee shirt (this becomes the ruffle)  Cut an asymmetrical neckline by starting underneath one sleeve, and cutting diagonally up to the right side of the collar/neckline.  Then, take the fabric you set aside for the ruffle, and pin it how you want it along the new, funky, asymmetrical neckline.  Sew the ruffles on, and voila!  All done.  I did have to take my tee shirt in on one side because it was too big and fell down a little too low.  AHEM.  Can't have any wardrobe malfunctions happening.


I think there is some definite cute possibility with this tee shirt.  I think I might add another ruffle layer, maybe something around the bottom.  This shirt took me maybe 20 minutes to throw together, and half of that was taking it in on the side so it would fit me correctly!

Now...I'm totally ready for summer!


~miranda

Shaking My Eggs in One Basket

Remember when we were kids and the school year seemed to take FOREVER? Adults would always say that time goes faster and faster as you get older. It's not a lie - I feel like Christmas was yesterday.... how is it Easter?? Complete. Insanity. As Macie and I were shopping for some cleaner and milk (yup, I'm that exciting) I realized how into Easter eggs Macie is. Every time we went by a display of them, she would freak out... and yes, there were about a million displays for them. Since her brain-dead mother left her sock bunny in plain sight for her to find (mom-fail), I thought I needed to find some eggs for her sad little basket. This pin  fit the bill -- almost. 


I loved these baker twine eggs from Landee See, Landee Do but I didn't think that Macie would fully appreciate their cuteness. As I was contemplating this, little miss Macie started boogying into the kitchen. She is a little dancer people. I never understood the saying "she sang before she talked" until now. Macie sings with her own little words and dancing to her own little music - it's hilarious. All she needs are her own little instruments.... Hellooooo egg shaker! Brilliant! 


I bought some cheap eggs (.50 for 12, a bargain) and grabbed some dried lentils in the pantry and got to work. I half filled the eggs with the lentils and then hot glued them shut. I didn't want any little accidents if my little musician throws a tantrum. Once the glue was dry, the eggs sort of sit up on their own - they are sort of like weeble wobbles... I used to love those. Weebles wobble but they never fall down. Never mind. 


To wrap the eggs in bakers twine, place a small dot of hot glue on the top of the egg and secure the twine. Paint the egg with some Mod Podge and then continue to wrap the twine around the egg. I painted with the Mod Podge as I wrapped the egg so that it didn't too quickly. I heeded the warning of Landee and didn't waste too much time trying to wrap from the top of the egg to the bottom. She said it was too hard, and well - after a short attempt, it was. Once you get to the middle of the egg, cut the twine and start the process again from the bottom of the egg. Wrap until you meet in the middle and that's it. Done! 


Now Macie has a little Easter basket with a little bunny and little egg shakers. And yes, I'm giving my daughter smoothies in her basket - she doesn't eat candy ... she's one!


ROCK CHOC-olate...

(the title of this blog is a shout out to all my friends who are Jayhawks fans...of which I really know nothing about but have been reading Rock Chalk on Facebook all weekend so...there it is)

Oh baking, how I've missed you...

Just me, my Kitchen Aid mixer, some good music, chocolatesugarflour...oh the fun, oh the memories.

I seriously love baking - I love experimenting and finding new ways to make classic desserts.  I love experimenting and finding new HEALTHIER ways to make classic desserts.  I am still excited about today's post and recipe.

This chocolate cupcake is vegan, & {refined} sugar free, {refined} flour free.  I know you are saying, "Great - so a cupcake that tastes like what, a vegetable?"

I promise - this cupcake tastes like...a cupcake.  My husband ate 2.  They are rich, fluffy and delicious.  And once I had the cupcake down, I was on to the real challenge - the frosting.  How to make a vegan/dairy free frosting AND not use white/refined sugar?  It took a little experimenting, a lot of researching and of COURSE...Pinterest.

A basic chocolate vegan cupcake recipe from Chow.com - I tweaked the original recipe, so check out my version below.

And, for frosting...


Are you ready?!

Chocolate Vegan Cupcakes with Chocolate Mousse Frosting
Printable Recipe


Yield: 10-12 cupcakes
1 cup almond milk
1 teaspoon apple cider vinegar
3/4 cup coconut palm sugar
1/3 c. pureed prunes + 1 Tblsp melted coconut oil (I literally pureed prunes in my food processor and added the melted coconut oil for a smooth consistency)
1 teaspoon vanilla extract
1/2 teaspoon coffee extract (optional)
1 cup whole wheat pastry flour
1/3 cup cocoa powder, Dutch-processed or regular
3/4 teaspoon baking soda
1/2 teaspoon baking powder
1/4 teaspoon salt

Preheat oven to 350°F and line a muffin pan with paper or foil liners.

Whisk together the almond milk and vinegar in a large bowl, and set aside for a few minutes to curdle. Add the sugar, prune mixture, vanilla extract, and other extract, if using, to the almond milk mixture and beat until foamy. In a separate bowl, sift together the flour, cocoa powder, baking soda, baking powder, and salt. Add dry ingredients to wet ingredients slowly and beat until no large lumps remain (a few tiny lumps are OK).

Pour into liners, filling 3/4 of the way. Bake 18 to 20 minutes, until a toothpick inserted into the center comes out clean. Transfer to a cooling rack and let cool completely.

 Note: You can use any kind of milk, regular sugar, canola oil instead of the prunes and white flour if you don’t have any of the above ingredients! 


Chocolate Mousse Frosting
Yield: approximately 5 cupcakes, generously frosted.  You might want to double this for a full batch!

1 can coconut milk
1/4 cup plus 1 T cocoa powder (I used dutch processed cocoa for this and only put in 3 T of cocoa powder and it is still a little too much cocoa for me...so adjust according to your tastes!)
1/2 tsp pure vanilla extract
sweetener to taste (I used about 2 tsp of coconut palm sugar that I ground up in my spice grinder.  Took literally about 5 seconds to become the consistency of powdered sugar!) 

Open the coconut milk, and leave the can (or transfer to a bowl) uncovered in the fridge overnight. (Don’t shake the can before opening.) It should get very, very thick.  

Once thick, transfer to a bowl (you can opt to leave out the watery bit at the bottom of the can, if you want it even thicker) and whip in your cocoa, vanilla, and sweetener .  Stored uncovered in the fridge, the mixture gets even thicker.  Pipe onto cupcakes!


Adapted from Chow.com and Chocolate Covered Katie


Can you believe those things are healthy?  And dairy free?  And made with whole wheat flour?  I know, me neither...


~miranda

Hit or Miss Monday

HAPPY MONDAY Y'ALL!

We're on Spriiiing Break.  Ok, my 5th grader is on spring break but that does mean I don't have to leave my house before 8am all week and that feels like a vacation to me...Anyone have any big spring break plans?

I don't know if it's the giddiness of knowing I can wear pj's all day tomorrow or the glass of Cabernet  I just had but this week's pins are legit cracking me up.  Like, I'm afraid my husband is going to think I'm crazier than he already does.  I just keep giggling like a maniac...

So without further adieu, here are this week's hit or miss pins...

Jamie's Hit:
You did it, didn't you? I so did. I had a roommate once that liked (LOVED) Friends and could quote every episode, every line - it was like free entertainment. Who doesn't love Joey??


And her Miss:
This is one of those things that I just don't understand, nope, not at all. Do I want to use my pants as a table? More importantly, do I want to walk around with a giant piece of elastic material connecting my legs?? People aren't going to realize they are my AMAZING picnic pants, they are going to think I am trying to re-enact the penguin scene from Mary Poppins!!


And my Hit:

Ok, I KNOW I'm not a dude, so I don't have "dude hair" problems.  But EVERYONE knows that hair looks completely different the day after your cut and style when you have to do it yourself.  I think hairstylists have some kind of secret voodoo spell they put on your hair to ensure your utter and complete dependence on them.  Also?  Donald Trump's hair?  FUNNY.


And my Miss:

I don't know if it's because we've been eating Vegan around here or what, but I just don't see the appeal in the Cheeseburger bed.  Because nothing says cozy and relaxing like meat and cheese?  Or curling up next to a big ol' piece of lettuce.  Maybe cuddling up with the smell of mustard and ketchup is the appeal??  Can someone help?


Also, make sure to check out this month's sponsors!  

Laura from Our Reflection
Cerrisse and Dotti from The Posh Daisy
Brianne from The Photog Nazi
Alicia with Miche
Vanessa with RootComputing

And our not new, but still awesome sponsors:


If you're interested in advertising, make sure to check out our advertising page for details and contact information.

Thanks everyone!  Have an awesome week, and don't forget to tell us what your hits and misses were!

~miranda and jamie